This is not a tutorial. It's ignition.
Your first 5 posts are calibration — you're teaching the AI who you are.
Your next 10 build momentum — edits get smaller, output gets sharper.
After 30, it stops sounding like AI.
Without a system, your ideas reset every day. With one, they compound.
Before You Begin — 3 Things You Should Know
If you've never used AI tools with API keys before, you probably have a few questions. Let's address them right now.
For the AI services (OpenAI and Anthropic) — yes. You register a payment method and pay only for what you use, just like any cloud service. PostFlow-AI itself starts free with no credit card required. If you decide to upgrade to a paid plan later (Starter or Professional), that's a separate, fixed monthly subscription.
Much less than you might think. PostFlow-AI's AI cost works like an electricity bill — you pay only for what you use:
- 1 post = about $0.05
- 30 posts/month = about $1.50
- 100 posts/month = about $5
The PostFlow-AI subscription (if you choose a paid plan) is separate from these AI costs.
No. You can set a monthly spending limit (called a "Hard Limit") on OpenAI. Once you hit that limit, it simply stops — no surprise charges, no runaway costs. We'll show you exactly how to set this up in Step 3.
With $5 credit on each AI service and a $5–$10 monthly spending limit, you have full control and enough budget for weeks of content generation. Now let's get started!
Download & Launch PostFlow-AI
Download PostFlow-AI from the link provided on the home page. You will receive a .zip file.
Right-click the downloaded .zip file and select "Extract All…". This creates a folder with all necessary files inside.
Inside the folder, you will see these items:
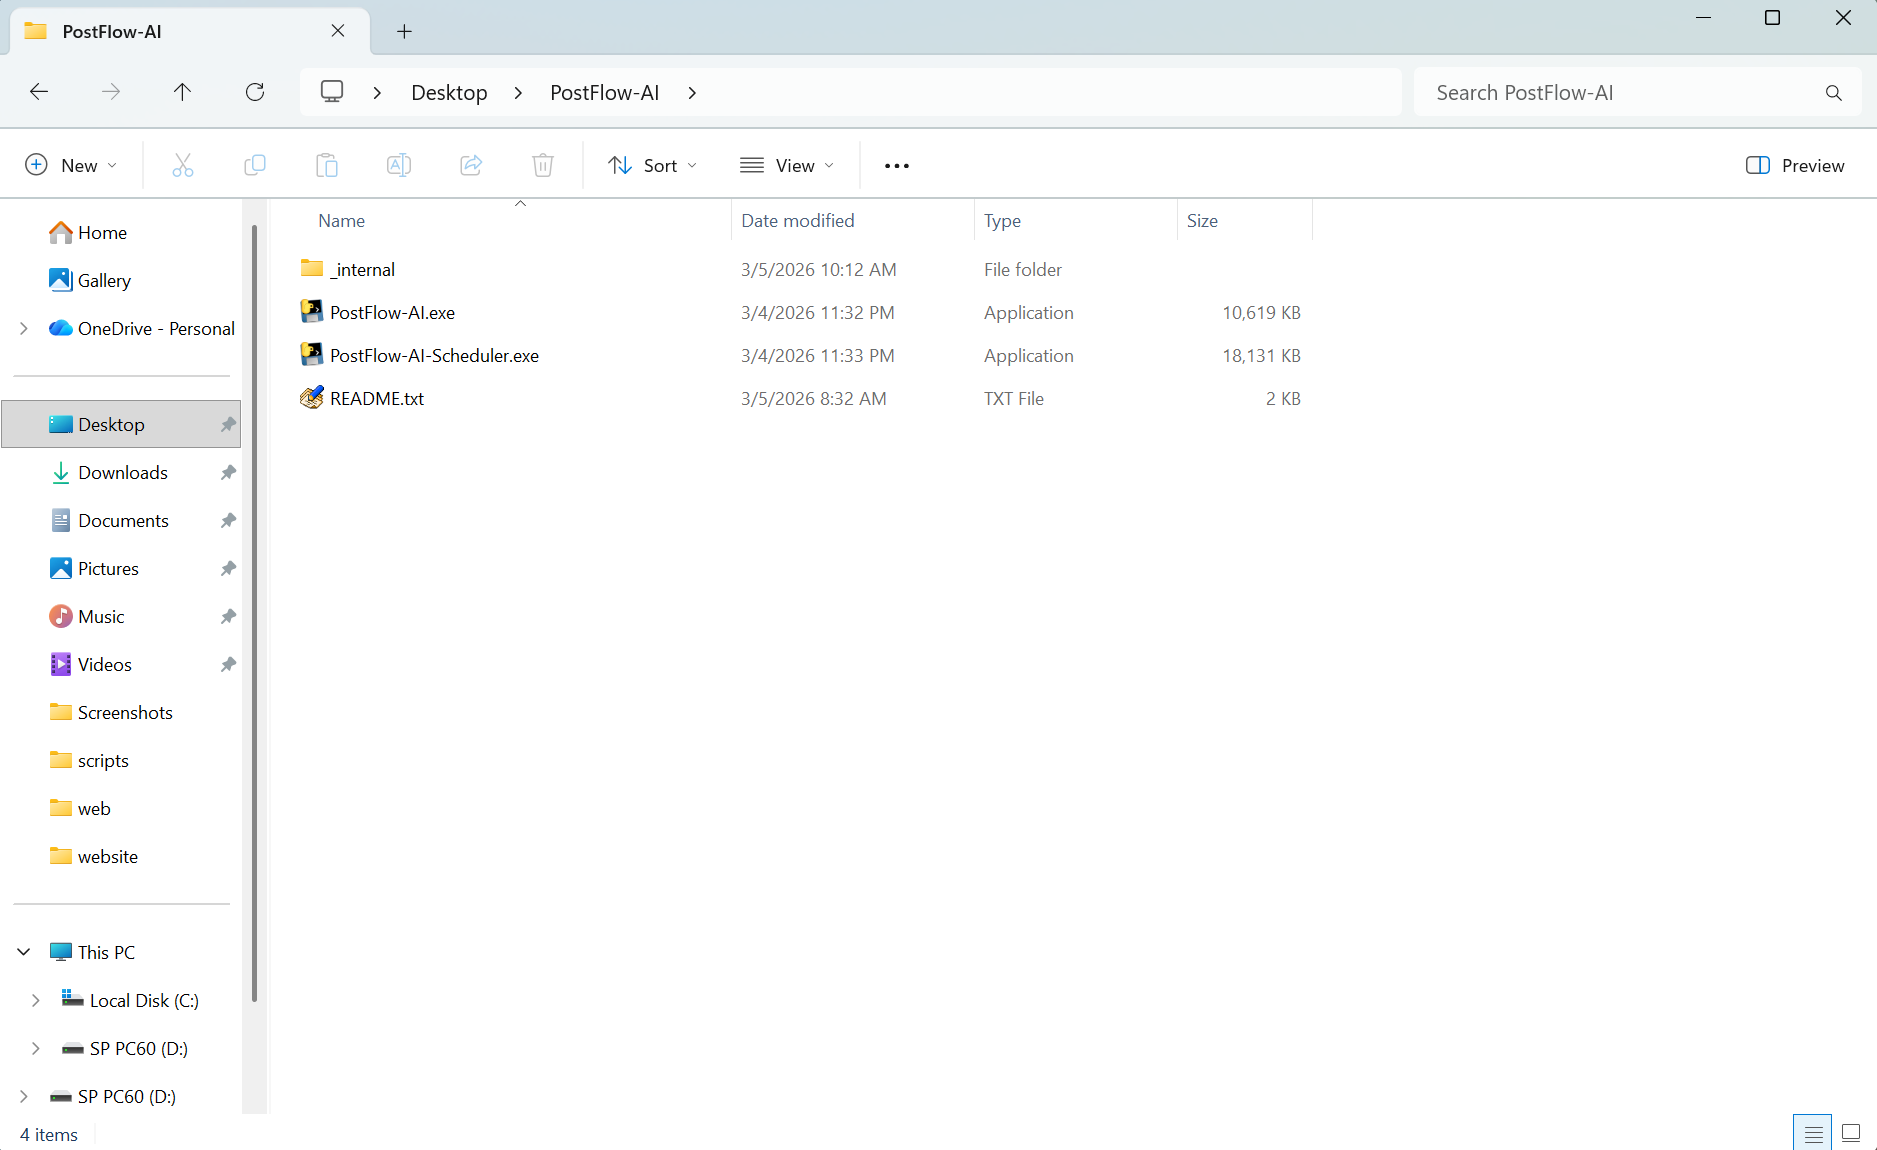
A browser window will open automatically — this is the PostFlow-AI dashboard where you control everything.
A black console window will also appear — do not close it. It runs in the background while you use the dashboard.
PostFlow-AI runs directly from the folder — no Python or programming tools required. Just double-click and go.
Choose Your Plan
PostFlow-AI offers three plans. You can start for free — no credit card required.
- Free → Try — Experience the AI and see if it fits your workflow
- Starter → Operate — Consistent daily posting. The "set it and run" plan
- Professional → Scale — Growth engine with engagement tools, long-form articles, and unlimited publishing
| Feature | Free | Starter ($79/mo) | Professional ($265/mo) |
|---|---|---|---|
| Content generation | Unlimited | Unlimited | Unlimited |
| Monthly publishes | 5 | 30 | Unlimited |
| Topics | 2 | 3 | Unlimited |
| AI quality | Same as paid | High | High |
| Platforms | Threads + X + Instagram | + WordPress | All 4 platforms |
| Web Search | 👑 | ✓ | ✓ |
| Engagement Tools | 👑 | 👑 | ✓ |
👑 = available in higher plans. Features are visible but locked on Free.
You can generate as many posts as you want — even on the Free plan. The monthly limit (5 on Free) only applies to publishing posts to your social media. This means you can try different topics, review multiple drafts, and only publish your favorites.
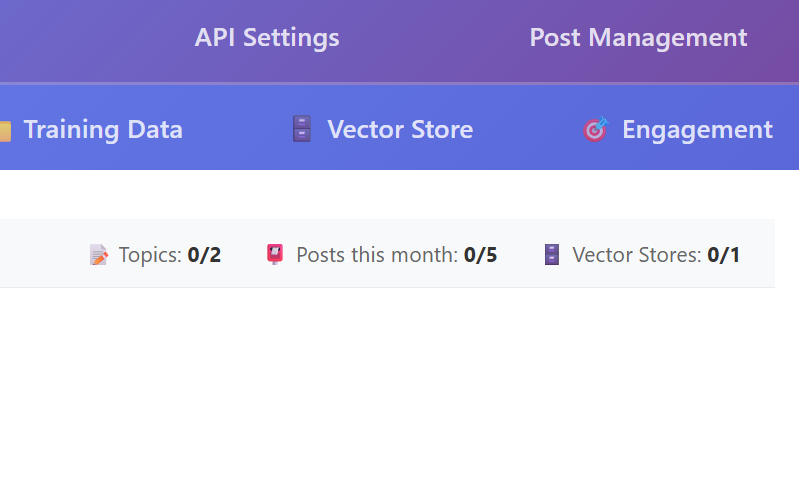
When you first open PostFlow-AI, it automatically starts on the Free plan. You'll see a usage indicator in the dashboard header showing your remaining posts for the month.
Some premium features (like WordPress posting and Web Search) will show a 👑 icon — you can see them, but they're unlocked when you upgrade.
When you're ready to upgrade, go to the API Settings tab and enter the License Key you received after purchase. Click Verify & Register to activate your plan.
The first 100 users get 25% off forever on any paid plan. Use code FOUNDING25 at checkout, or use the direct links on the home page — the discount is applied automatically.
Get & Enter Your API Keys
As we covered above, each post costs about $0.05. You'll set a spending limit below so nothing can exceed your budget.
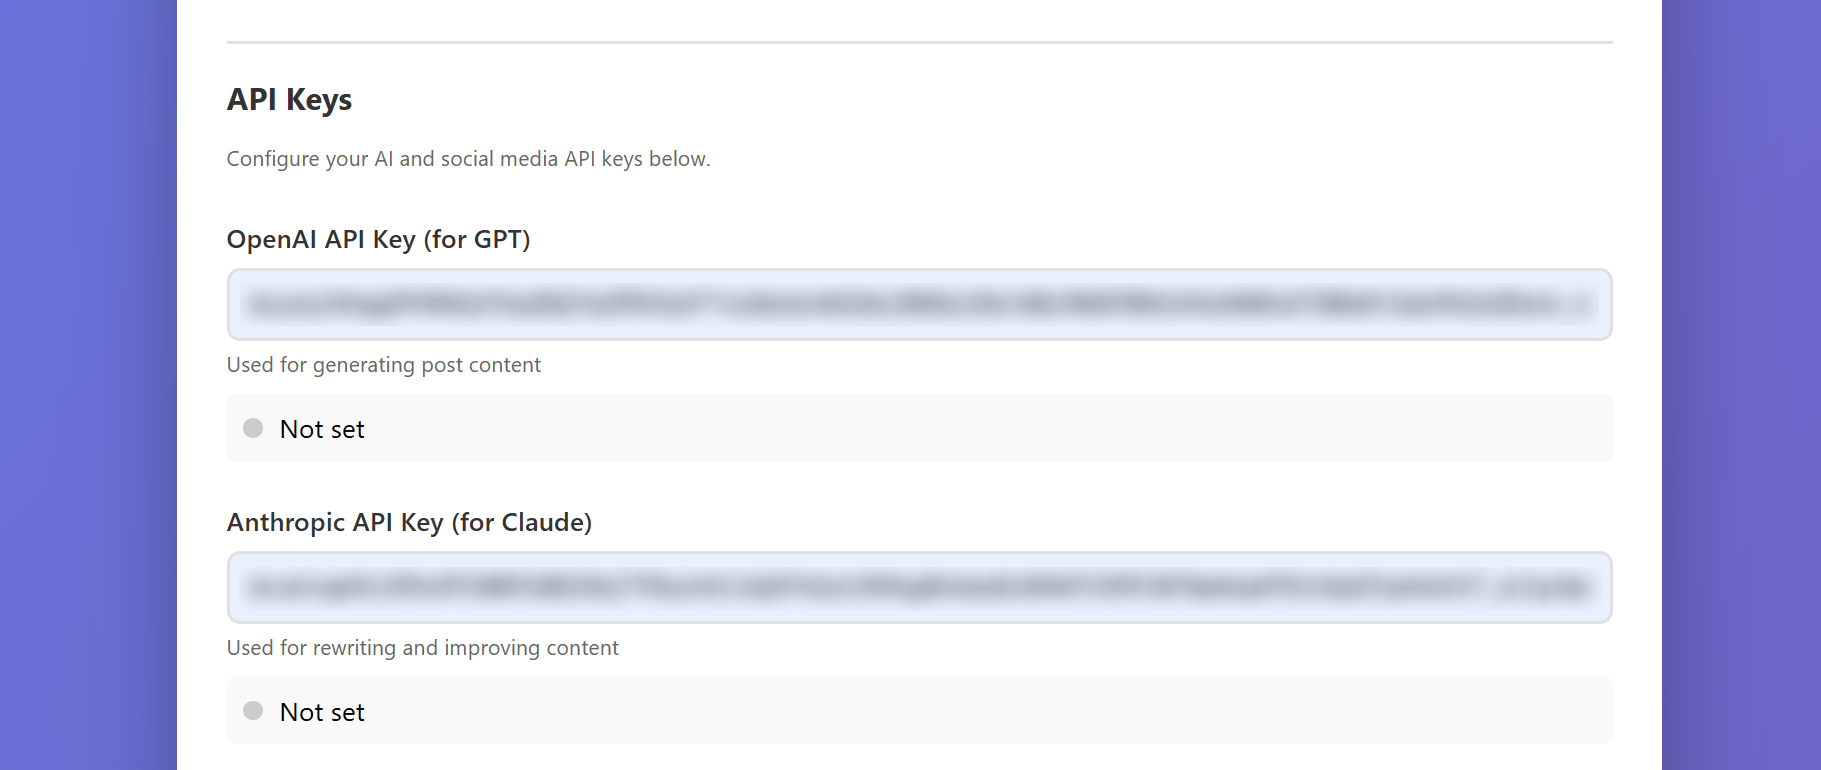
PostFlow-AI uses two AI services to generate your content. To connect them, you need API keys — think of them as passwords that let PostFlow-AI talk to these services on your behalf.
Imagine you want to order food through a delivery app. The app needs your account credentials to place orders for you. An API key works the same way — it's a code that gives PostFlow-AI permission to use AI services (like OpenAI and Anthropic) under your account. You create it once, paste it in, and you're done.
You need two API keys:
This key lets PostFlow-AI use GPT-5.2 to generate and evaluate your content.
- Go to platform.openai.com and click "Sign up" (top right)
- Register with Google, Apple, or email + password. Complete email verification if prompted
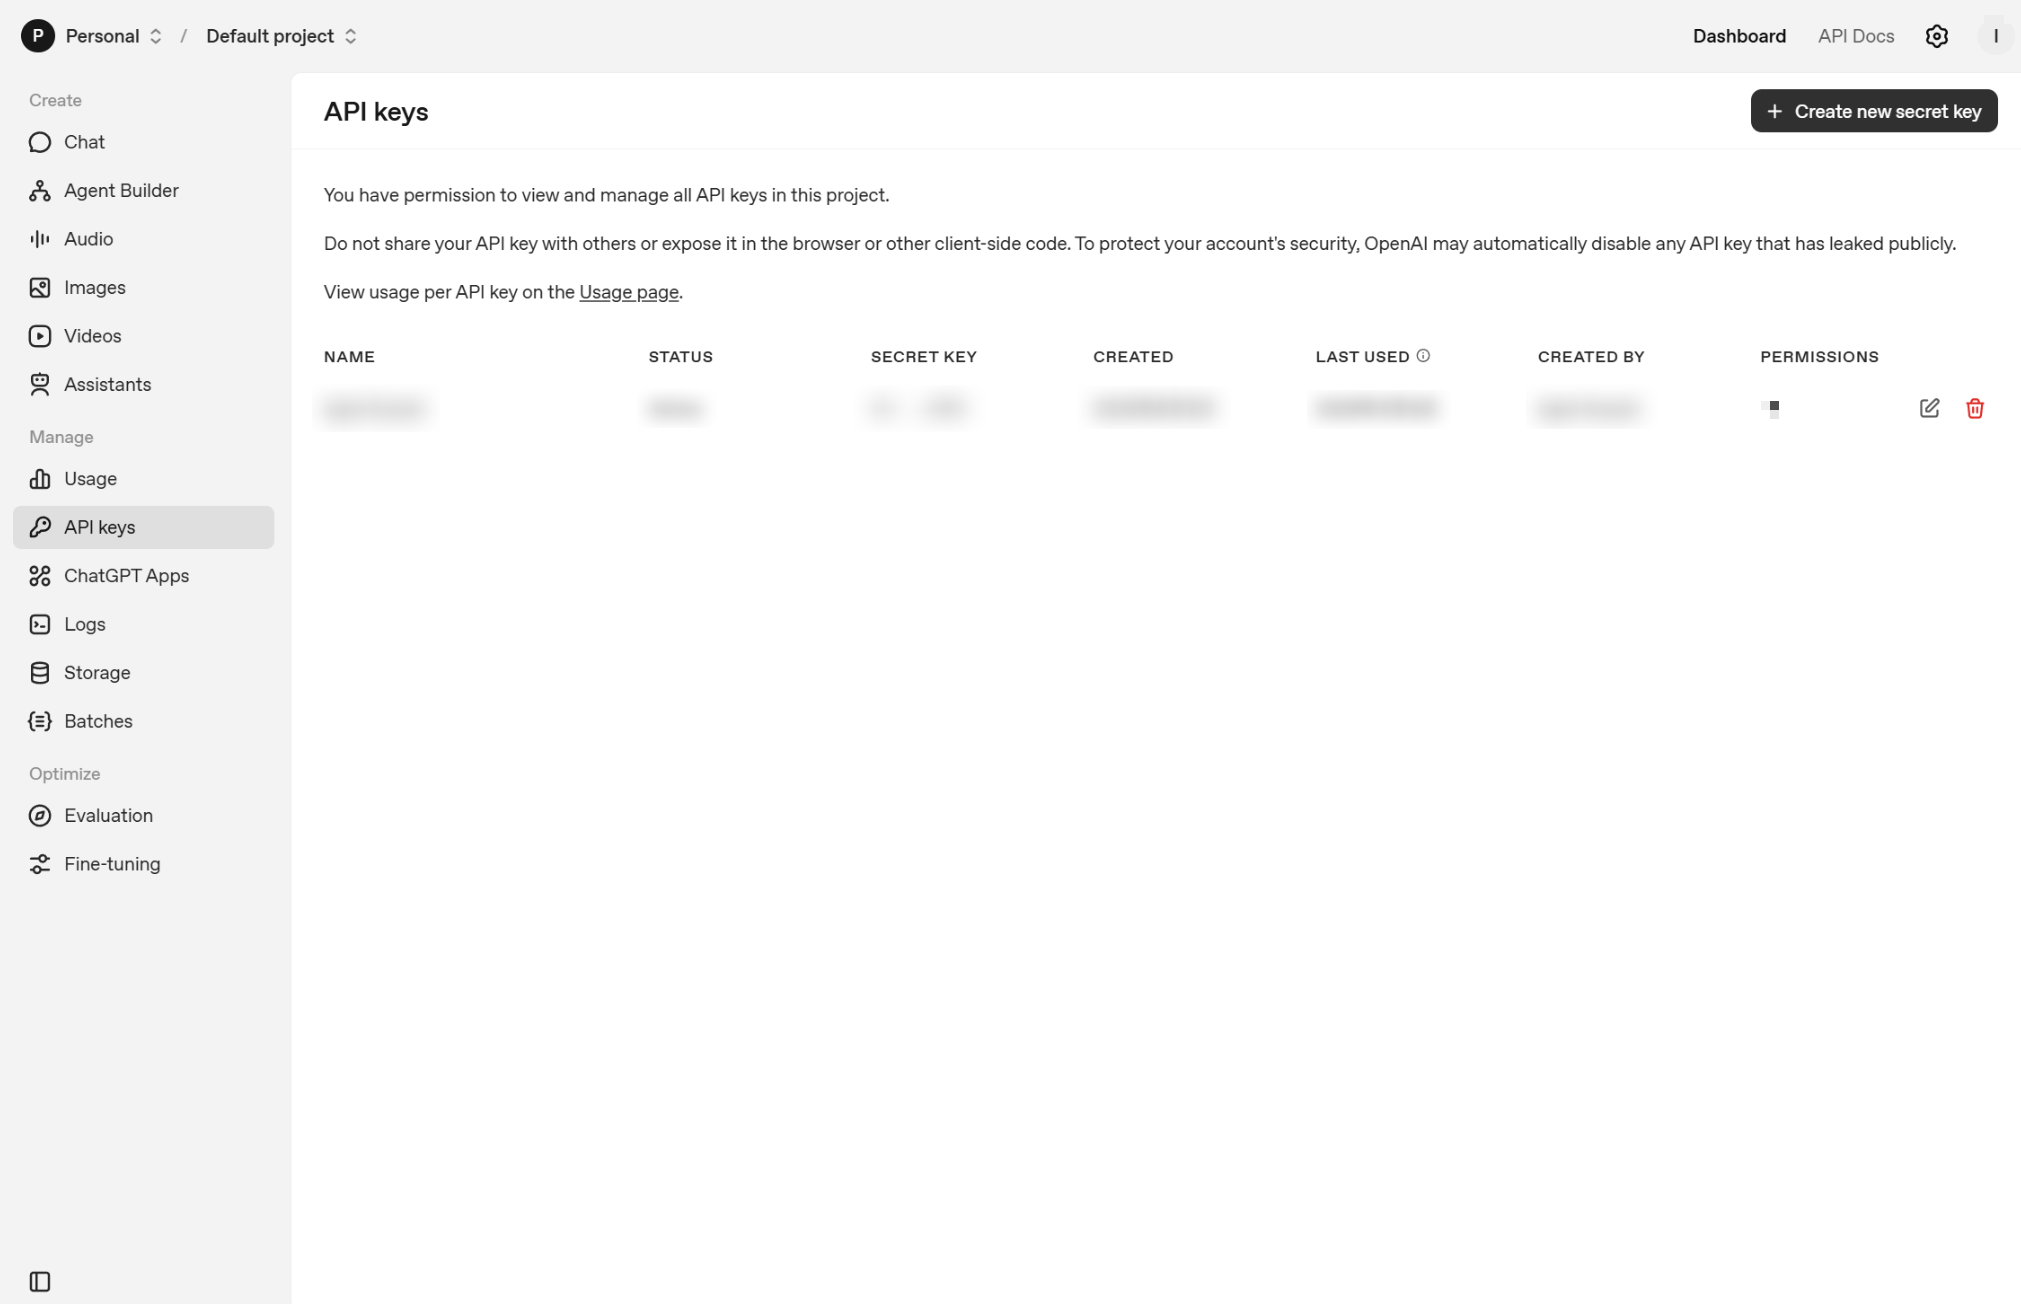
- After signing in, go to platform.openai.com/api-keys
- Click "+ Create new secret key", give it a name (e.g. "PostFlow-AI"), then click "Create secret key"
- A key starting with
sk-will appear — copy it immediately and save it somewhere safe
After you close the dialog, the key cannot be viewed again. If you lose it, you'll need to create a new one. Copy it right away and save it in a password manager, notes app, or a secure text file.
💳 Add credit (required to use the API):
- Click the OpenAI logo (top left), then find "Billing" or "Add credit" in the sidebar
- Enter your credit card and purchase $5 of credit (minimum amount)
- Recommended: Set a monthly spending limit (Hard Limit) of $5–$10 to prevent unexpected charges
- Choose whether auto-recharge is on or off — turning it off gives you full manual control
This key lets PostFlow-AI use Claude Sonnet 4.6 to rewrite your content in your personal voice.
- Go to console.anthropic.com and click "Sign Up"
- Register with email + password. Complete email verification by clicking the link in the confirmation email
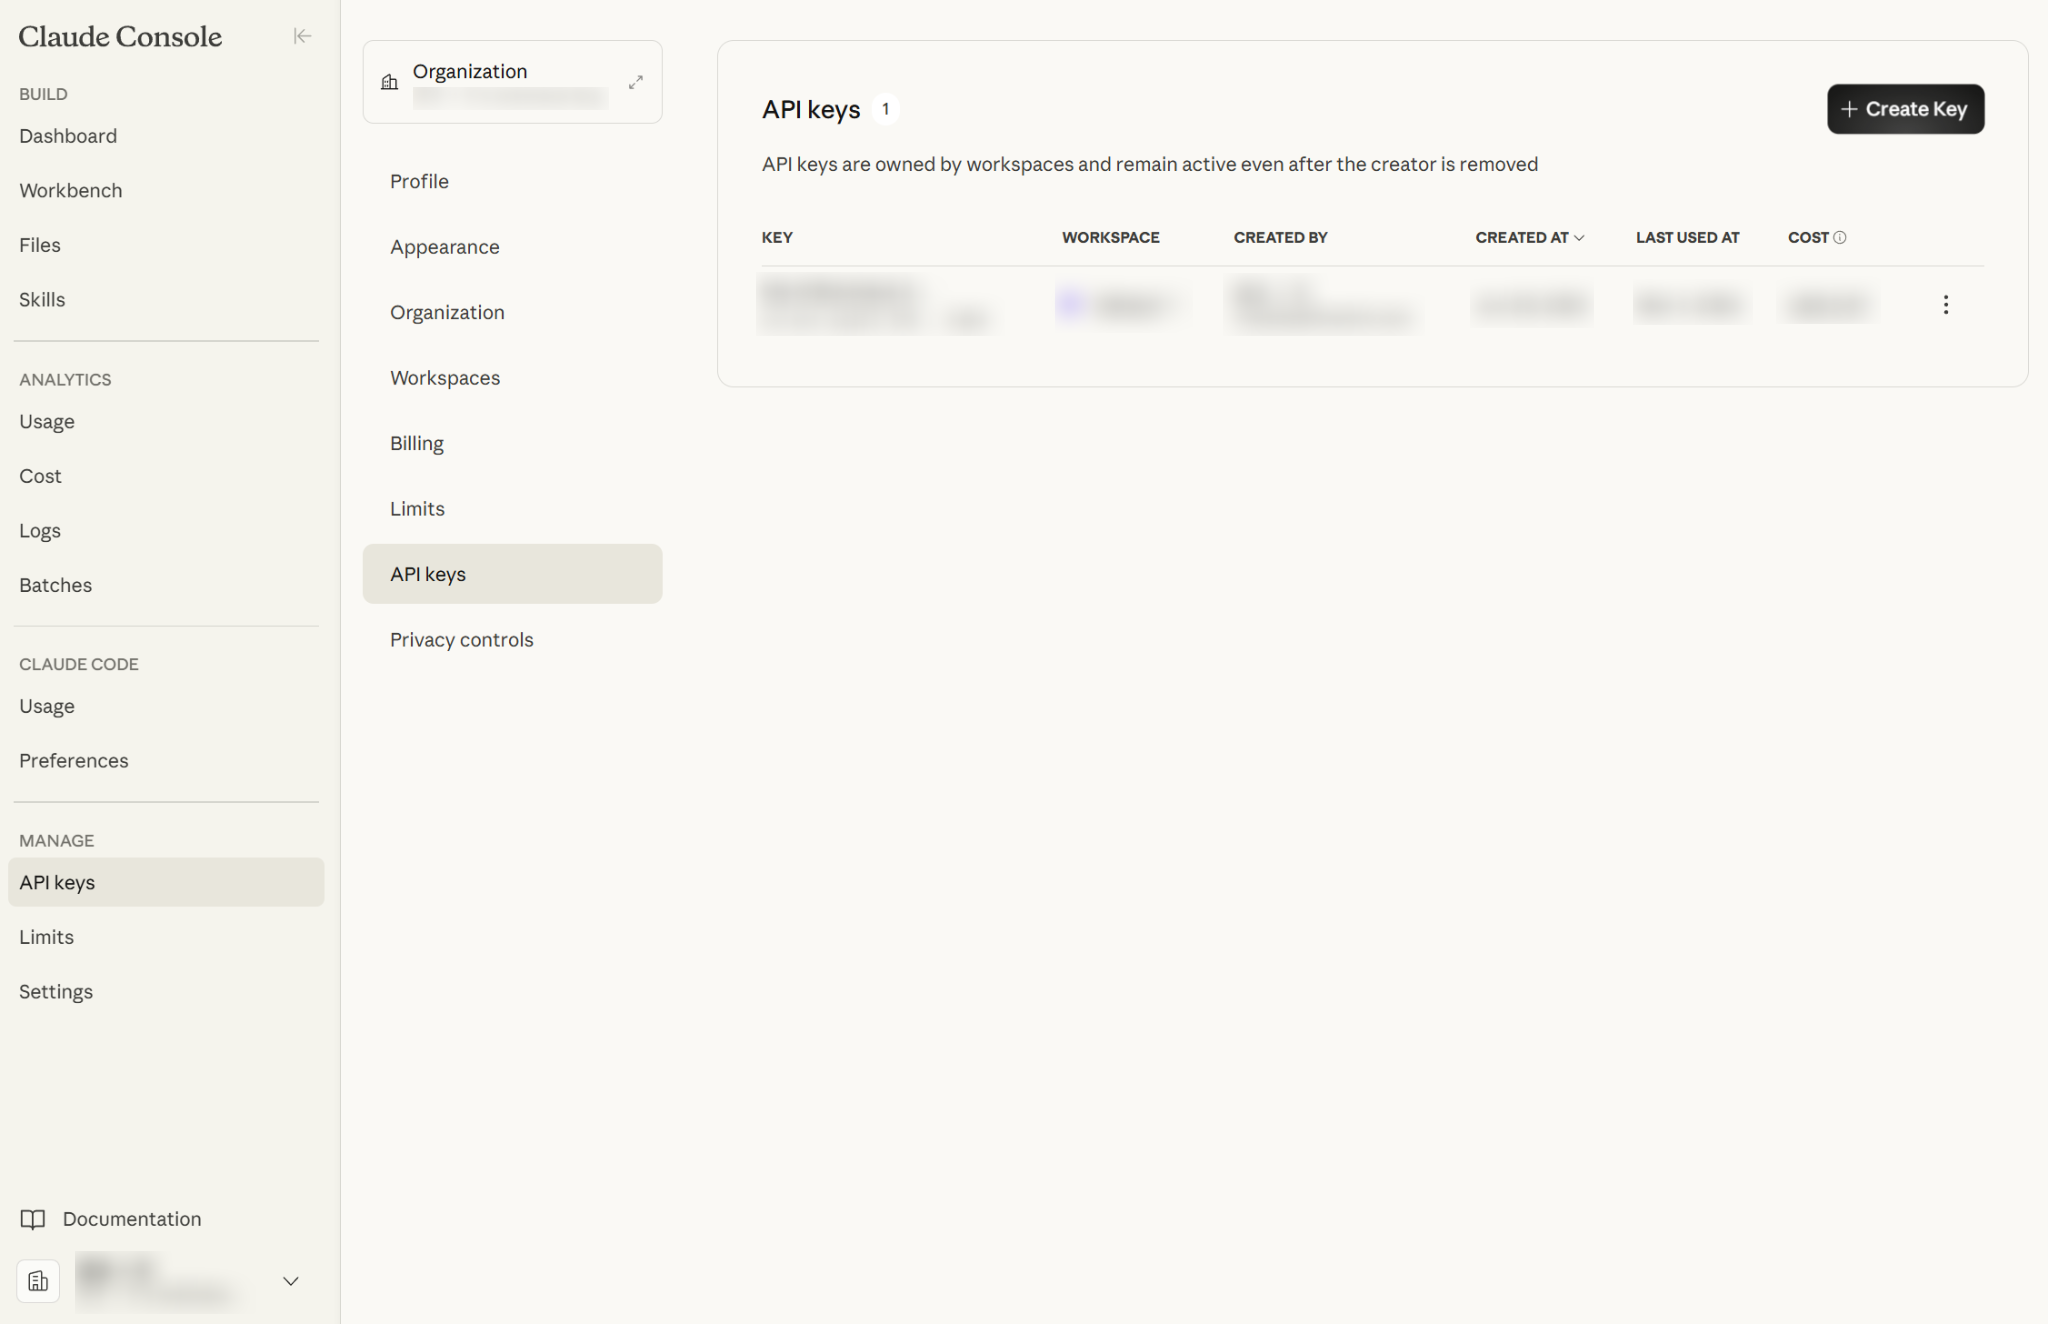
- After signing in, go to API Keys section in the dashboard
- Click "Create Key" (or "New Key")
- A key starting with
sk-ant-will appear — copy it immediately and save it somewhere safe
Just like OpenAI, the Anthropic API key cannot be viewed again after you close the dialog. Copy and save it right away. If you lose it, you can always create a new one — but the old one won't come back.
💳 Add credit:
- Go to Plans & Billing in the console sidebar
- Register your credit card and add $5 of credit to start
API keys are like passwords — anyone who has them can use your account and your credit. Never share them on social media, blogs, or public code repositories. Store them in a password manager or a secure notes app. If a key is ever leaked, delete it immediately from the dashboard and create a new one.
In the PostFlow-AI dashboard, go to the API Settings tab. Paste each key into the corresponding field and click Save Settings.
OpenAI API credit and your ChatGPT Plus subscription are completely separate. The same applies to Anthropic API credit and Claude.ai Pro. Even if you're already paying for ChatGPT Plus or Claude Pro, you still need to add credit to the API console separately.
No — as long as you set a monthly spending limit (Hard Limit) in the OpenAI billing settings, your costs are capped. With $5 credit and a $5–$10 monthly limit, you have full control. PostFlow-AI's per-generation cost is extremely low (~$0.05), so even heavy use stays well within typical limits.
PostFlow-AI uses a multi-step AI pipeline (GPT-5.2 generates → reviews → Claude rewrites → GPT-5.2 selects the best). Each post generation involves 10 API calls across both services.
Typical cost per generation (English, Standard length):
- GPT-5.2 (7 calls): ~$0.032
- Claude Sonnet 4.6 (3 calls): ~$0.024
- Total per generation: ~$0.05–$0.06
Monthly estimate on the Free plan:
- Generate 5, publish 5 → ~$0.28/month
- Generate 10, publish best 5 → ~$0.56/month
- Generate 20, publish best 5 → ~$1.12/month
Start with $5 credit on each service — it will last for months.
Every time PostFlow-AI generates a post (even if you don't publish it), API costs are incurred. If you use the scheduler to generate 20 drafts and only publish 5, you are charged for all 20 generations. Generate wisely — or enjoy the freedom to experiment!
Languages that use multi-byte characters (Japanese, Chinese, Korean, etc.) consume more tokens than English for the same content length. Expect API costs to be roughly 1.5–2× higher per generation when writing in these languages.
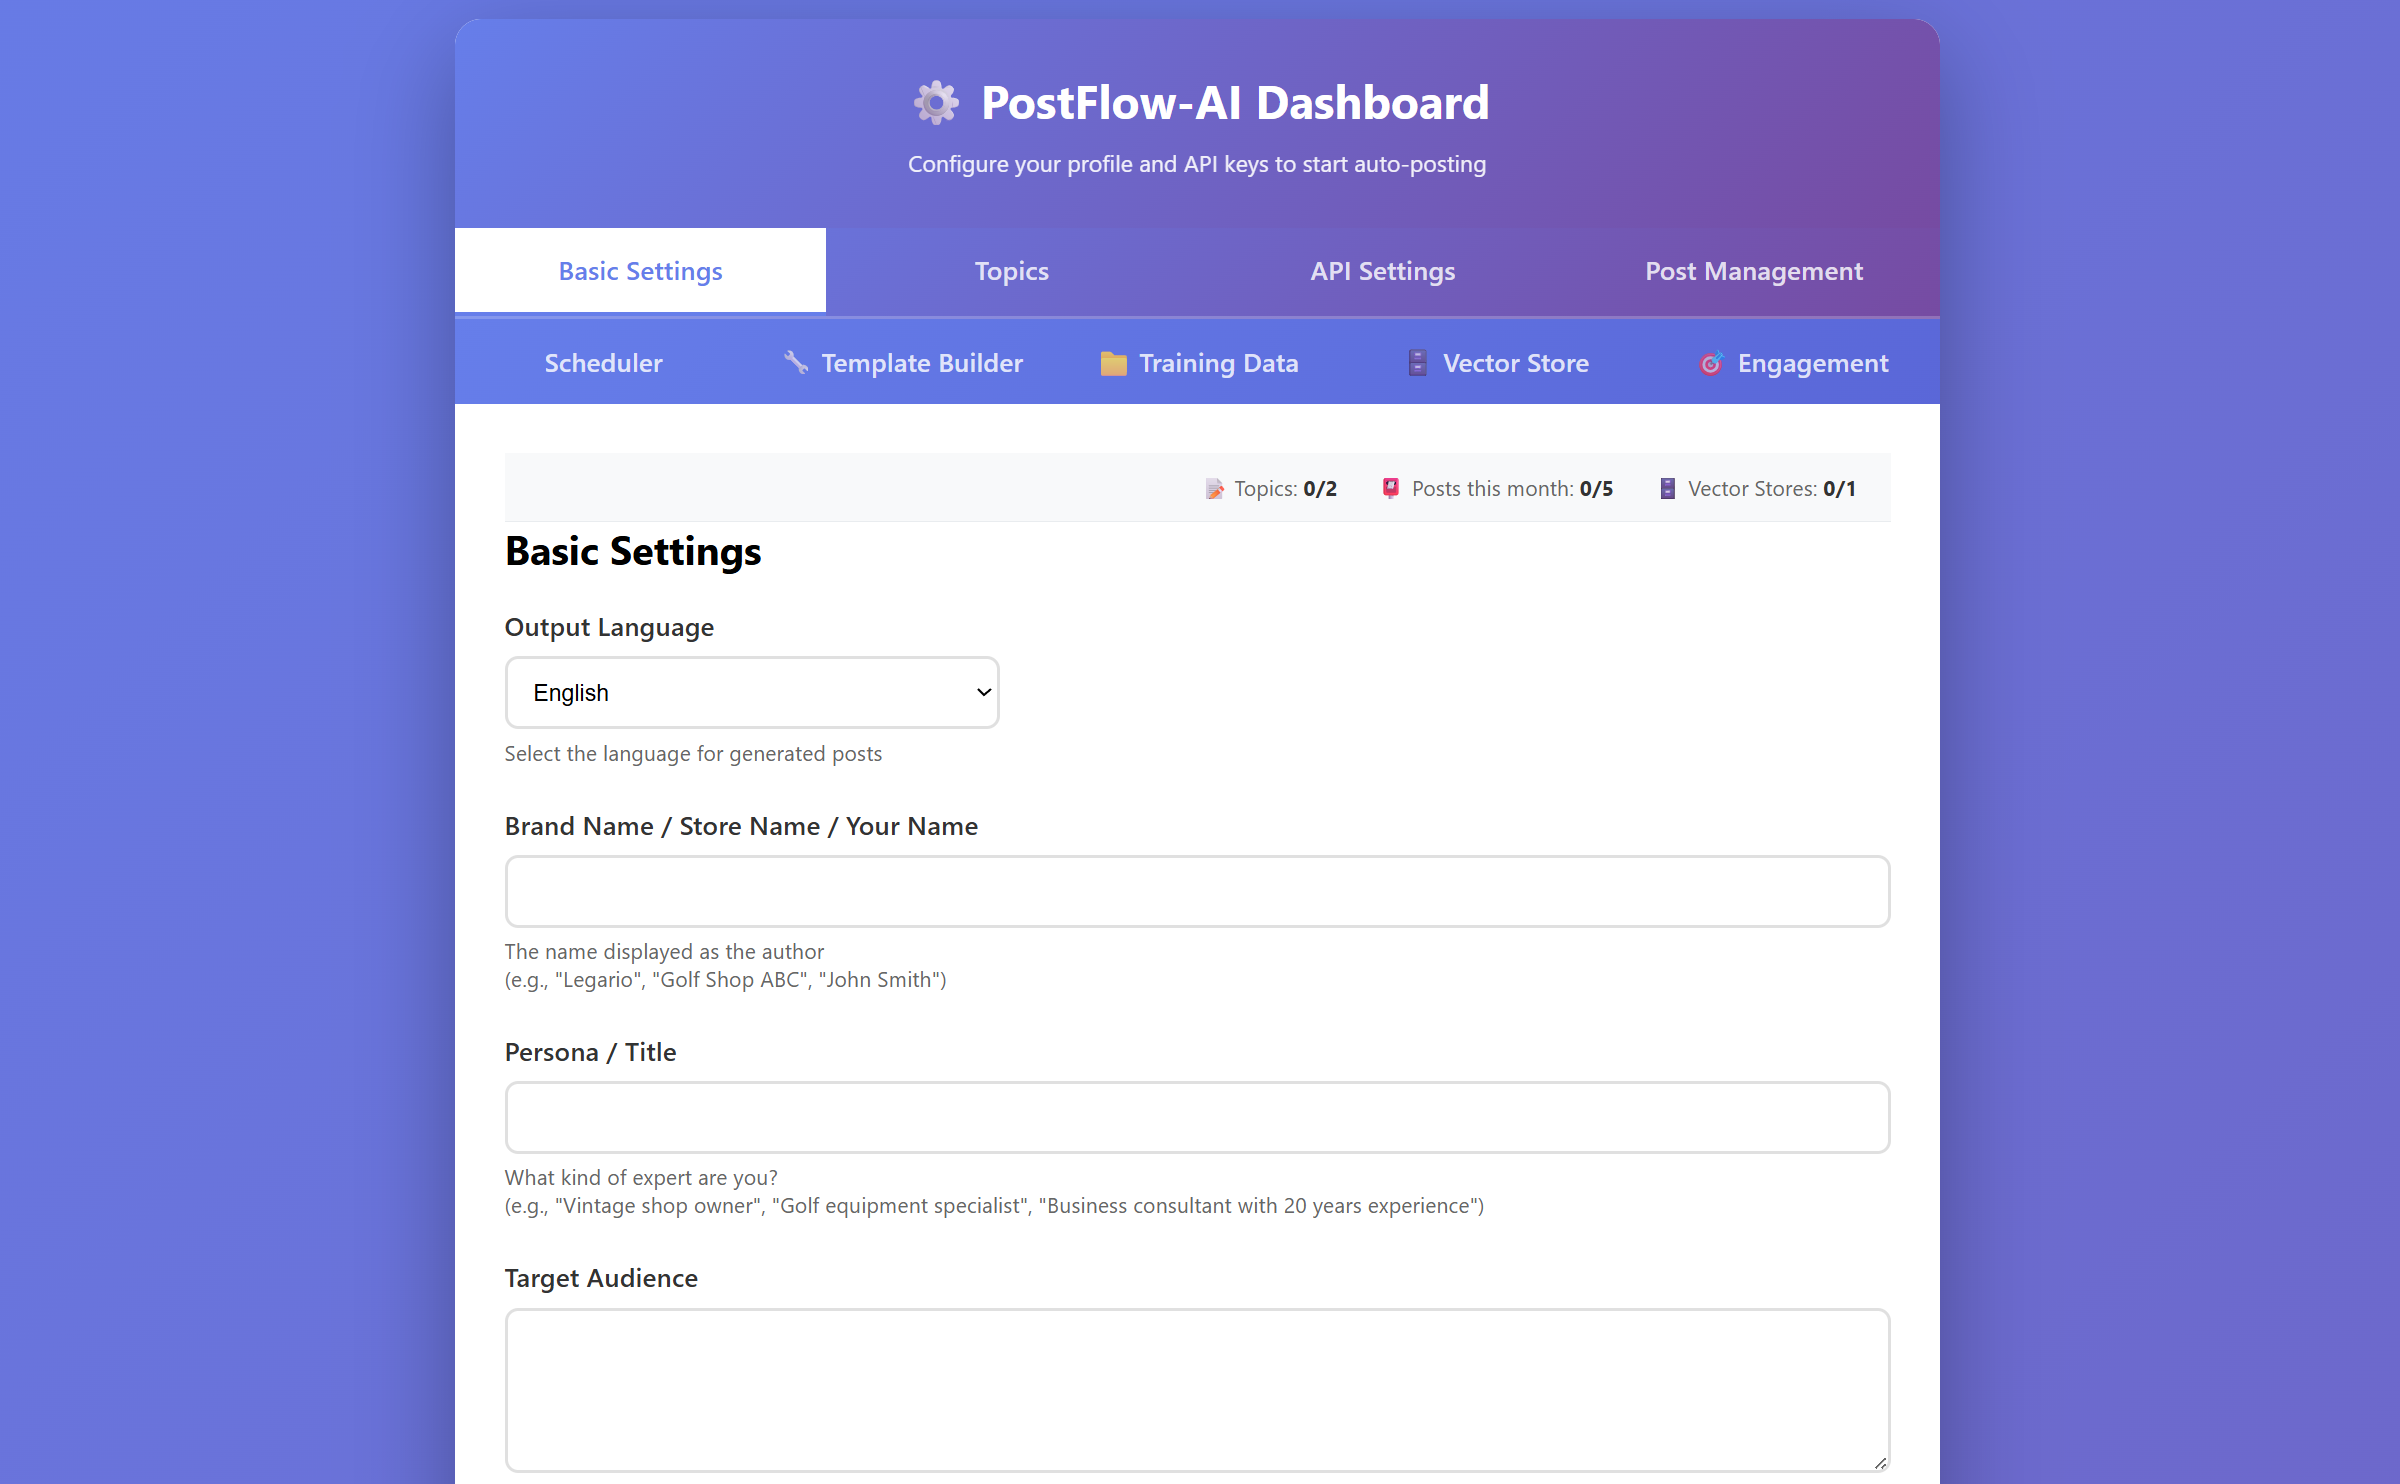
Tell the AI About Yourself
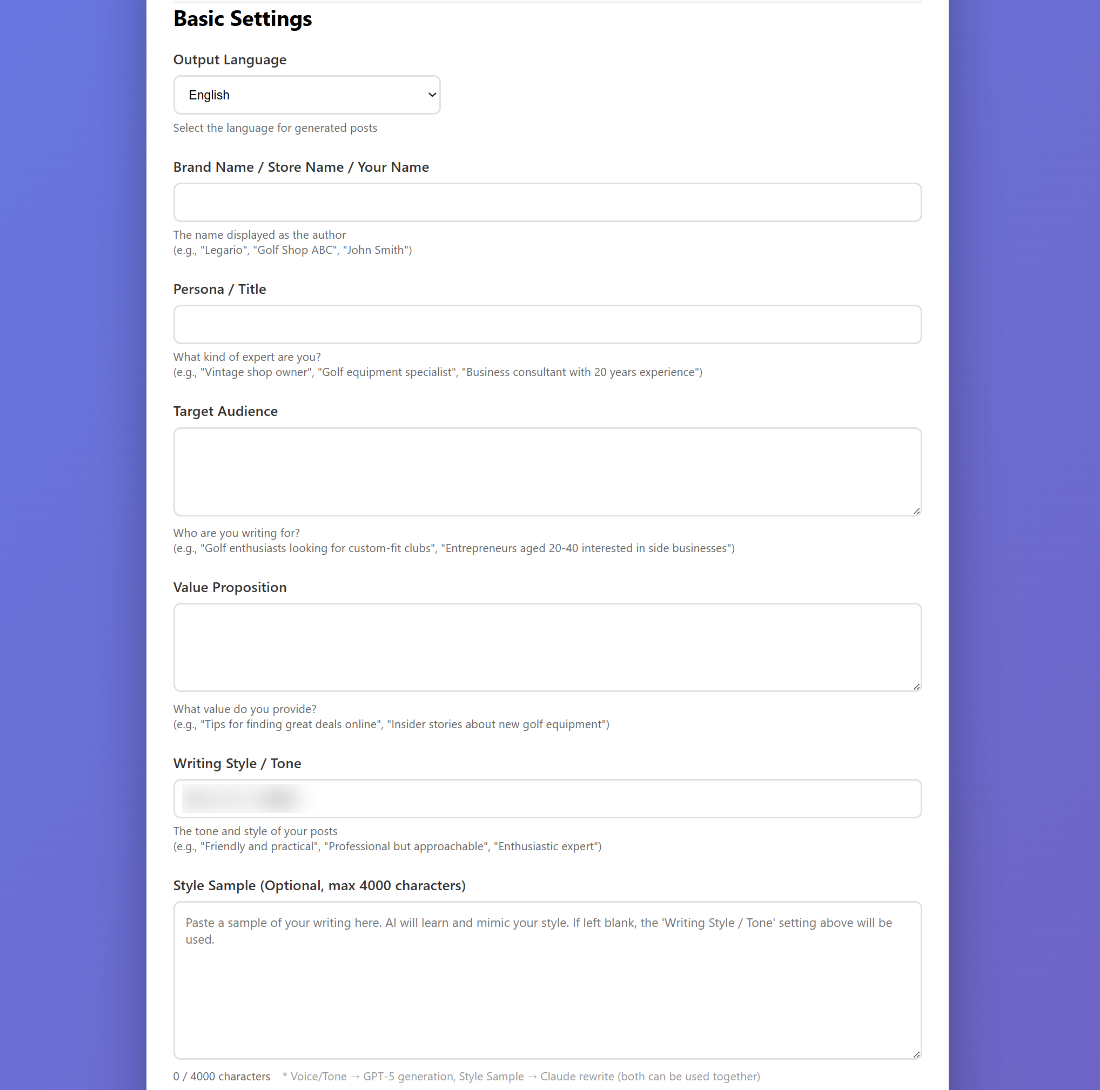
Go to the Basic Settings tab (the first tab). This is where you tell the AI who you are and how you want to sound. Fill in these key fields:
- Output Language — The language your posts will be written in (English, Japanese, etc.)
- Brand Name — Your business or personal brand name
- Persona — Who is "speaking" in your posts? Describe your role and expertise
- Target Audience — Who are you writing for? Their interests and needs
- Value Proposition — What value do you provide? What makes you unique?
- Writing Style / Tone — Describe your writing tone (e.g. "warm and practical" or "professional and concise")
Open ChatGPT or Claude.ai and say: "I'm a [your job] who helps [your audience] with [what you do]. Help me write a Persona, Target Audience, Value Proposition, and Writing Style description for my social media." — You'll get a great starting point in seconds.
- Style Sample — Paste 1–3 examples of your best writing. AI will learn your unique voice from these
- CTA (Call to Action) — What you want readers to do (e.g. "Visit my shop")
- CTA Frequency — How often to include the CTA (0.3 = 30% of posts)
When you're done, click Save Settings at the bottom of the page.
Don't worry about getting everything perfect on the first try. You can adjust these settings anytime and the AI will adapt.
Add Your Topics & Content Angles
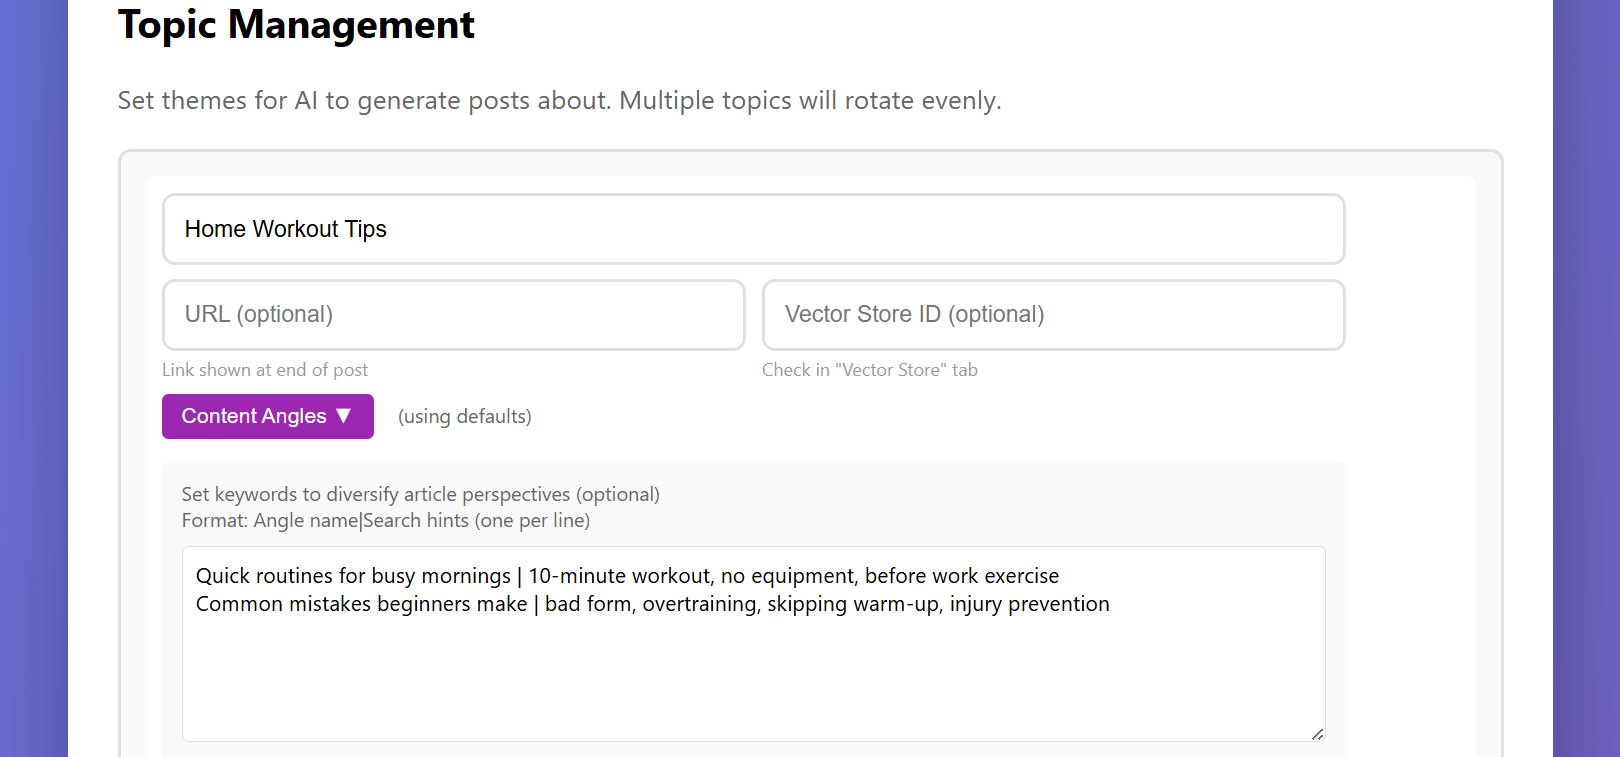
Go to the Topics tab. Topics are the main themes you want to post about.
Click + Add Topic and enter a topic name. For example:
- "Productivity tips for busy entrepreneurs"
- "Healthy eating on a budget"
- "AI tools for small businesses"
Content angles are different perspectives on the same topic. They keep your posts fresh and varied.
For each angle, add a label and some keywords separated by commas:
Time Management | schedule, calendar, focus, prioritize
Click Save Settings when done.
On the Free plan, you can have 2 topics with 2 angles each. That gives you 4 different content combinations — plenty to get started and see results.
Connect Your Social Media Accounts
Go to the API Settings tab. Here you'll connect the social media platforms where you want to publish.
Start with just one platform — whichever you already use or plan to use. You can add more later.
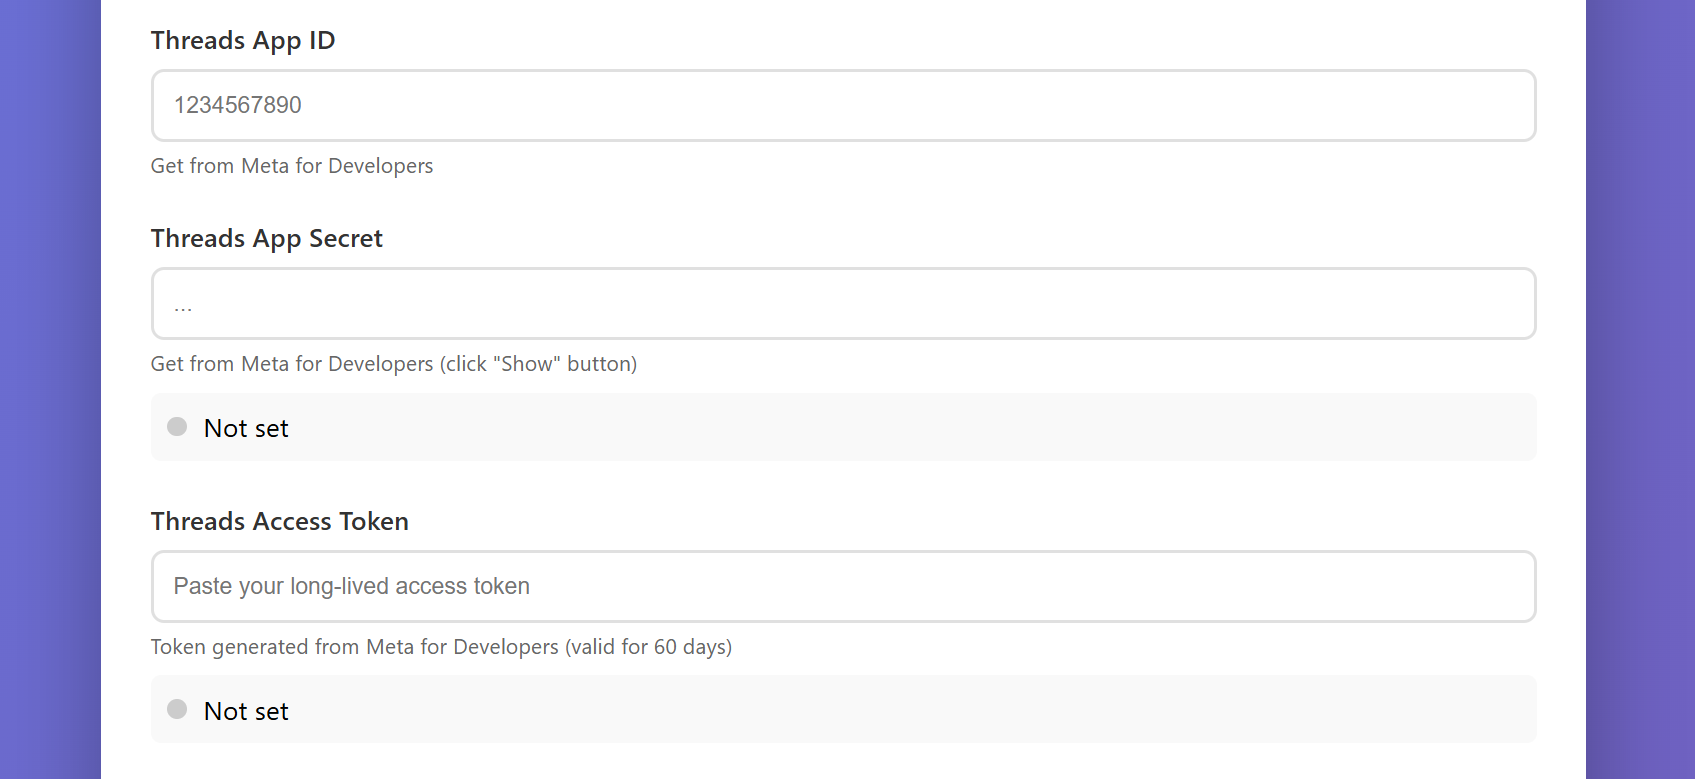
You need a Threads Access Token. Get it from the Meta Developer Portal.
- Create a Meta App (or use an existing one)
- Add the "Threads" use case
- Generate an access token
- Paste it into the Threads Access Token field
You need 4 keys from the X Developer Portal:
- API Key & API Secret
- Access Token & Access Secret
Paste all four into the corresponding fields in PostFlow-AI.
Enter your WordPress site URL, username, and Application Password (generated from WordPress → Users → Your Profile → Application Passwords).
Instagram requires a Business or Creator account connected to a Facebook Page. Enter your access token and User ID from the Meta Developer Portal.
When you post images to Threads or Instagram, PostFlow-AI needs to upload your image to a public URL first. This is handled automatically via WordPress if you have it connected — but on the Free plan (where WordPress is not available), you need an imgbb API key instead.
- Go to api.imgbb.com and create a free account
- Click "Get API Key" on your dashboard
- Paste the key into the imgbb API Key field in API Settings
imgbb offers a generous free tier — no credit card needed.
On the Free plan, WordPress is not available (👑 locked). If you want to post to Instagram (which always requires an image) or include AI thumbnails / Photo Library images in your Threads posts, you must set up an imgbb API key. Without it, image uploads will fail and Instagram posts cannot be published.
After entering your credentials, click Save Settings.
Then go back to Basic Settings and check the boxes for the platforms you want to post to (under "Post to").
Generate & Publish Your First Post
Everything is set up — time to create your first AI-generated post!
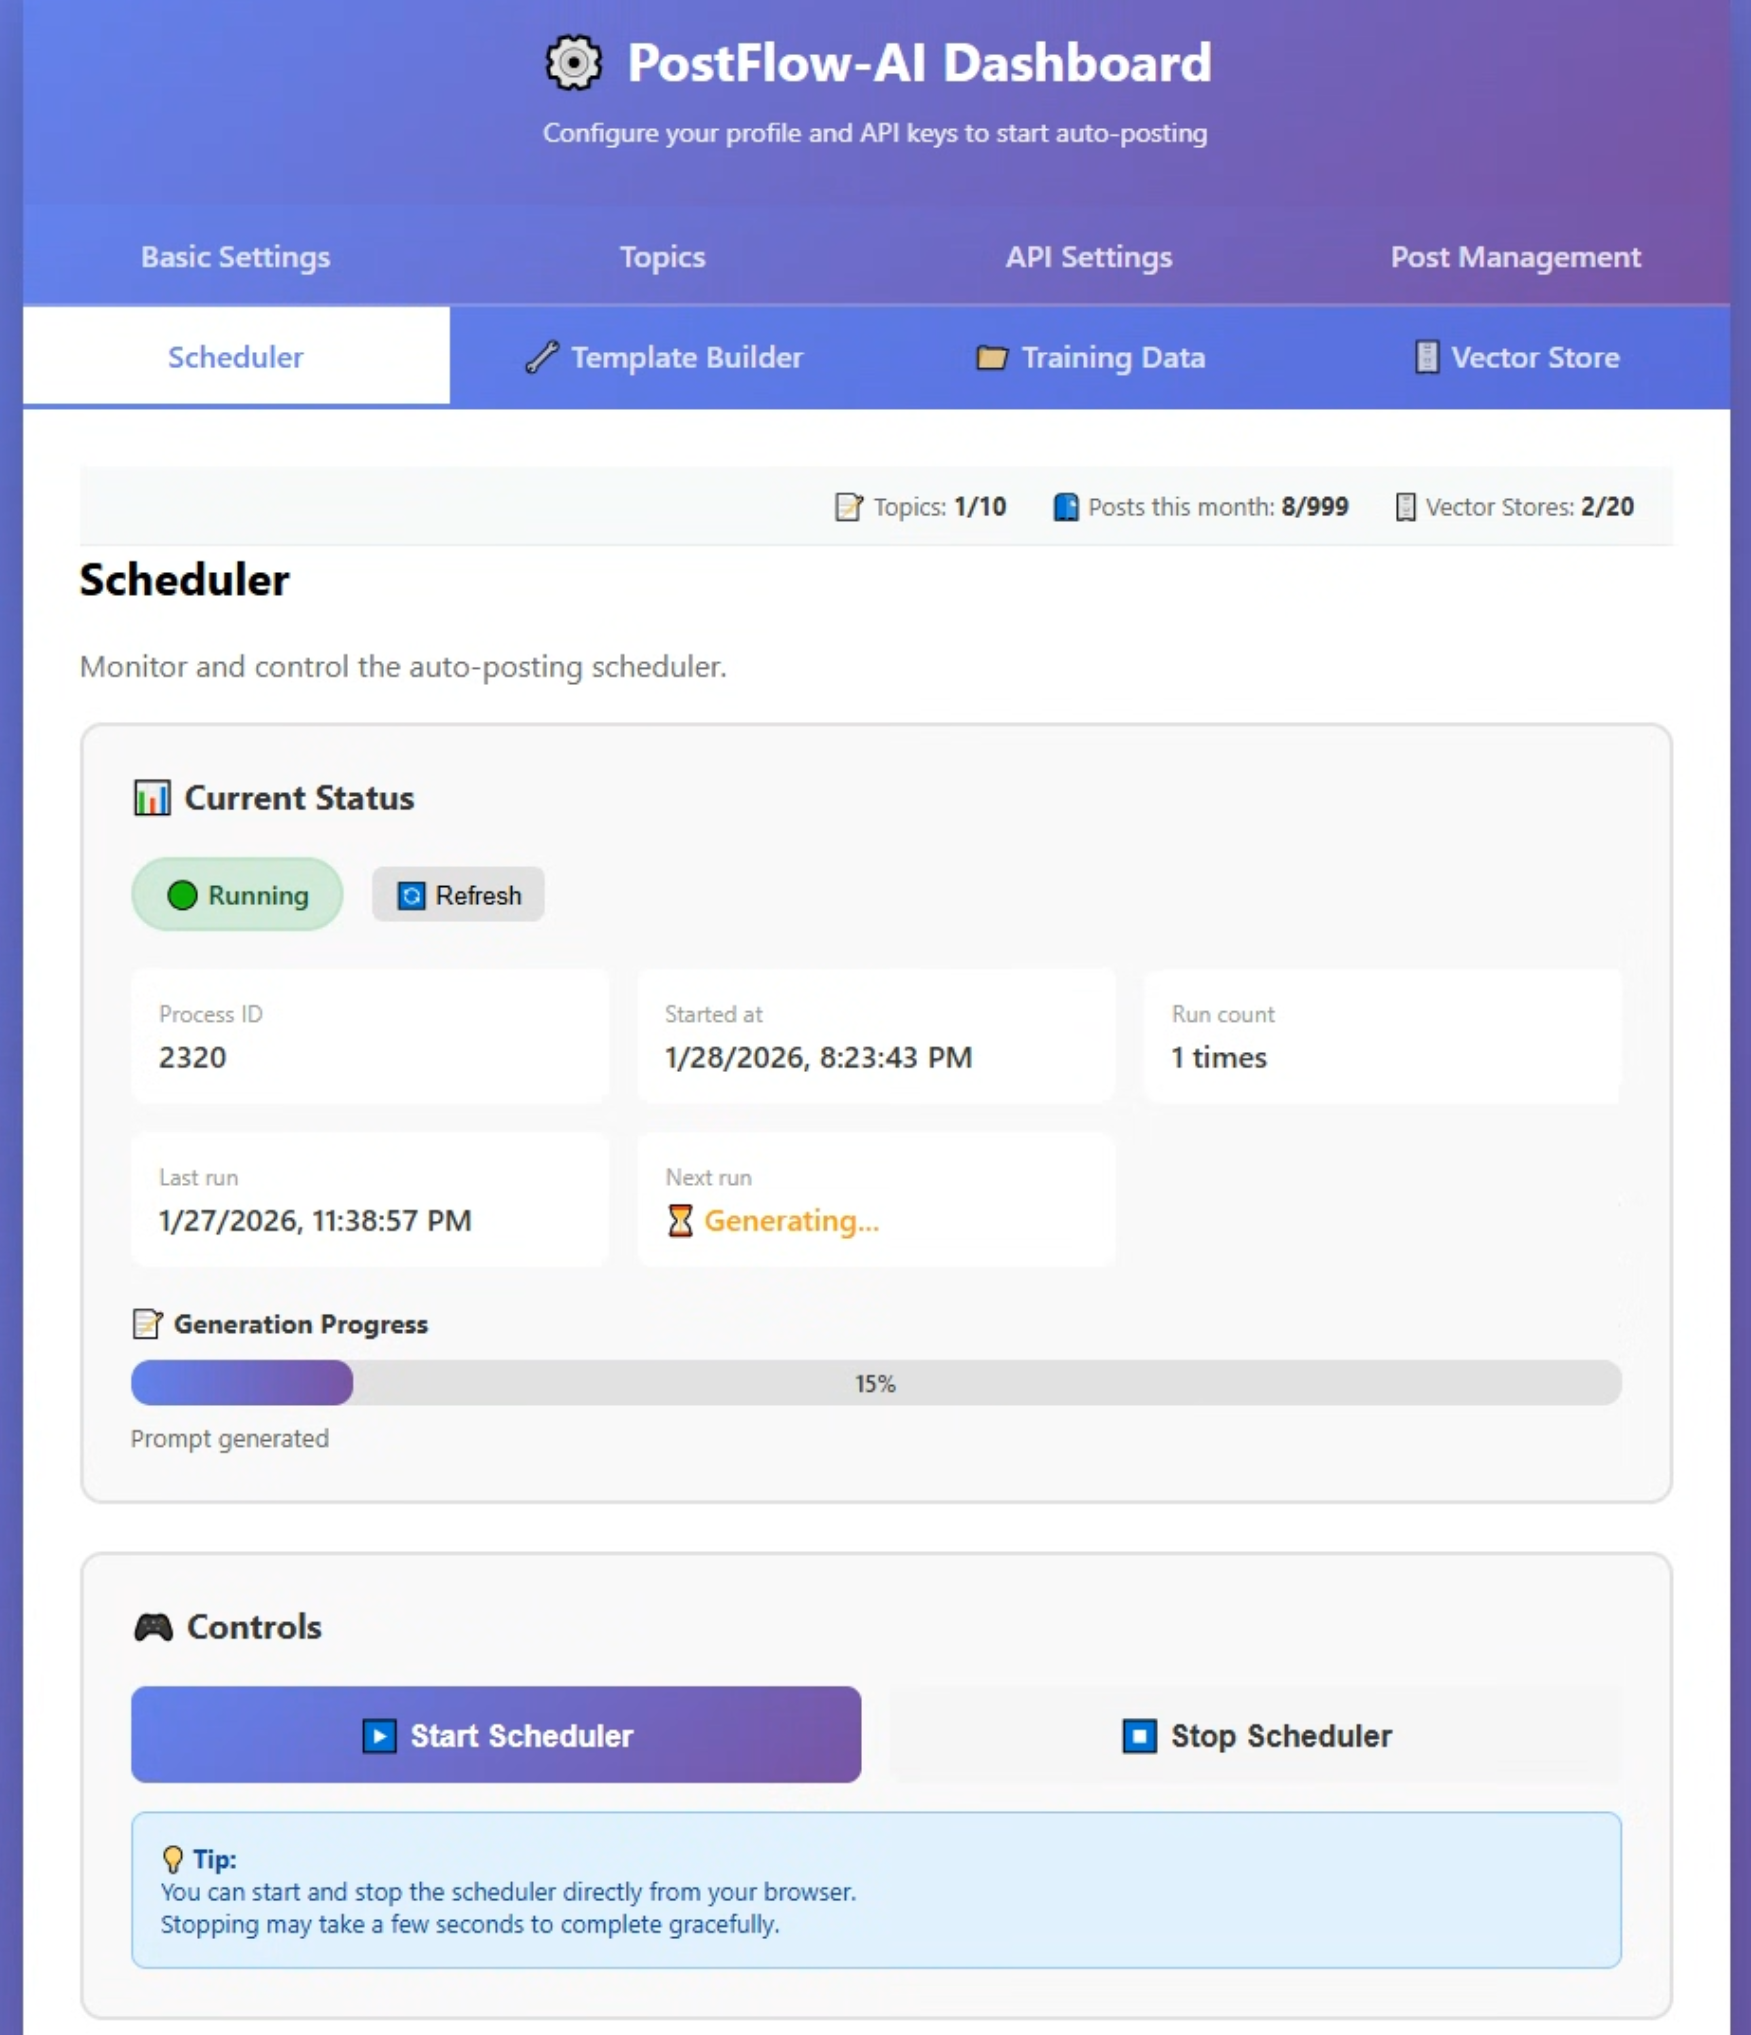
Go to the Scheduler tab and click ▶️ Start Scheduler. The AI will:
- Pick a topic and angle automatically
- Generate 3 different draft versions
- Rewrite each one in your style
- Select the best version and save it to your queue
This takes about 8–15 minutes depending on content length and AI service load. You'll see a progress bar while it works. Grab a coffee — it's working hard behind the scenes (10 AI processing steps).
Once generation is complete, go to the Post Management tab. You'll see your new post in the queue with these options:
- Edit — Read the full post and make any changes you want
- Publish Selected — Select posts with the checkbox, then publish to your connected platforms
- Delete Selected — Remove selected posts from the queue
The first 3–5 posts may feel a bit generic. That's completely normal — the AI is still learning your voice. Here's how it gets better:
- Posts 1–5: Calibration. Edit freely — every edit teaches the AI
- Posts 5–10: The AI starts sounding more like you
- Posts 10+: Most posts need only minor tweaks
The secret is the Feedback Loop: edit a post → add the improved version to your Vector Store → next post is better. See the User Guide for details.
📈 By post #20, you'll notice:
- Your tone stabilizes — it consistently sounds like you, not "AI"
- Your posts reference past ideas automatically from your Vector Store
- Content creation feels 3x faster — a quick edit instead of writing from scratch

Click the Post button. PostFlow-AI will publish your content to each platform you've connected, optimizing the format automatically:
- Threads — Full text (AI-summarized if over 500 characters with image)
- X — Full text or auto-summarized if over character limit
- WordPress — Full article with featured image
- Instagram — Caption with image (Markdown formatting auto-removed)
You've just published your first AI-generated post. It was written in your voice, based on your expertise, and posted to your platforms — all in a few minutes.
Set Up Automatic Posting (Optional)
PostFlow-AI can generate and publish posts automatically on a schedule — so you can focus on your business while your social media stays active.
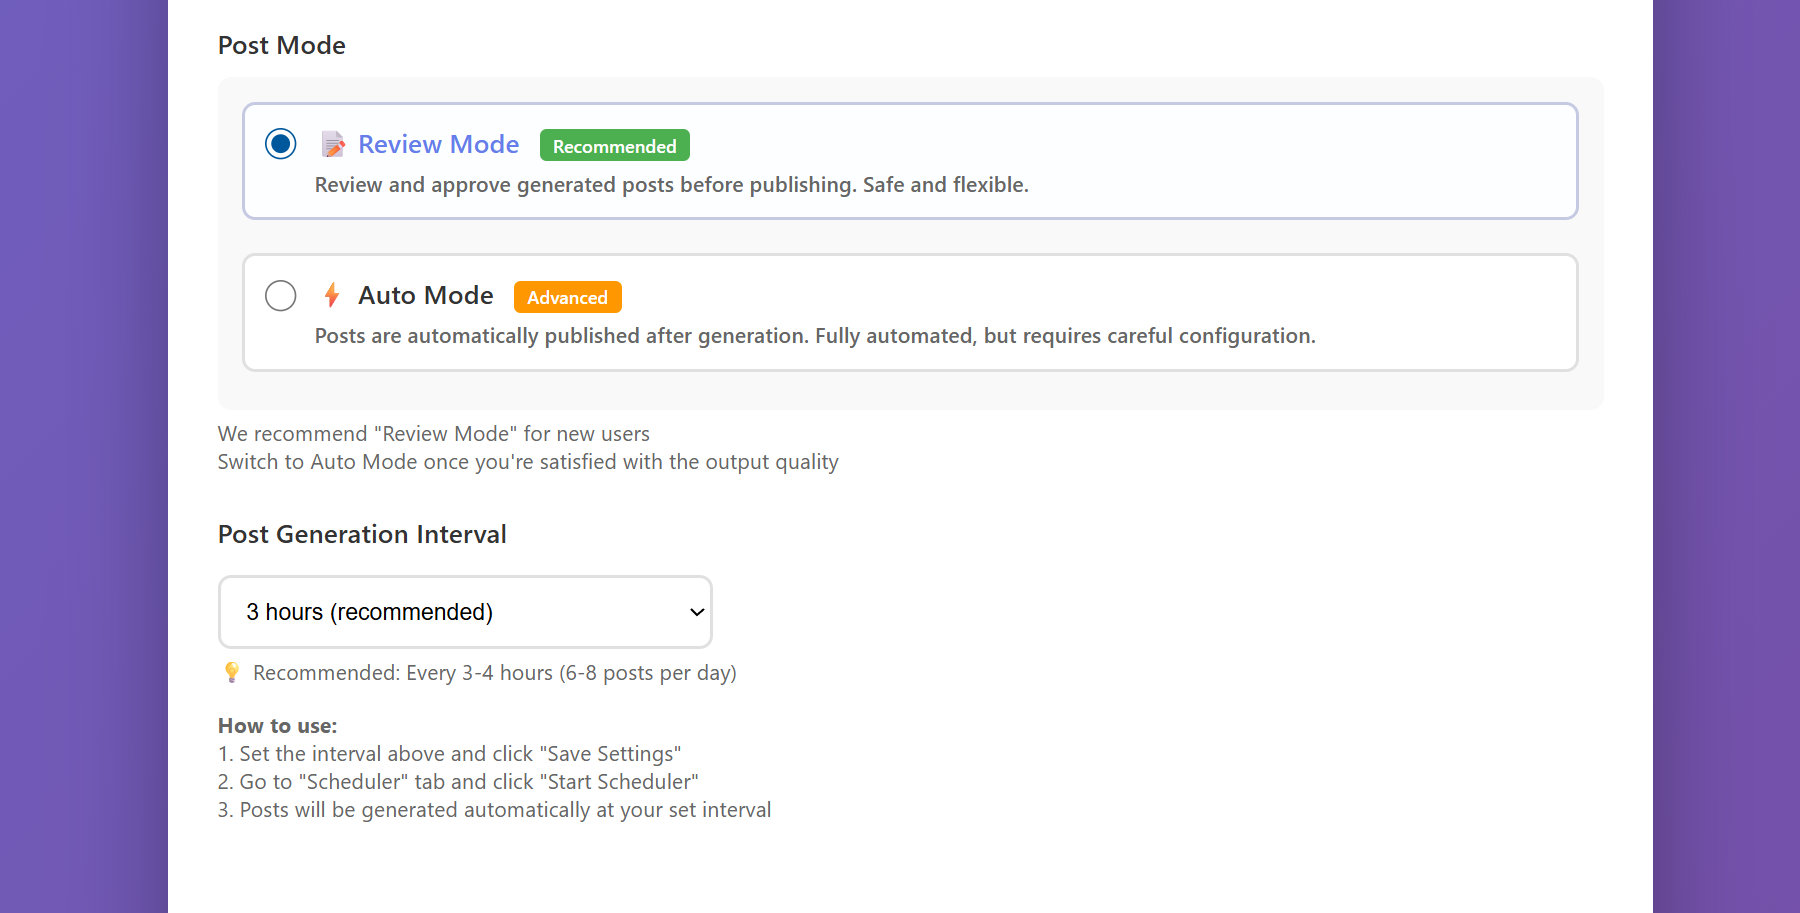
In Basic Settings, find the Post Mode setting:
- Review Mode (recommended) — Posts are generated and saved to the queue. You review and publish them manually
- Auto Mode — Posts are generated AND published automatically without review
In Basic Settings, find the Post Generation Interval dropdown. Choose how often you want new posts generated:
- 3 hours (recommended) = about 6–8 posts per day
- 8 hours = 3 posts per day
- 24 hours = one new post per day
PostFlow-AI runs on your PC. Automatic posting only works while your computer is on and the application is running. If you close the console window, the scheduler stops.
On the Free plan, you can publish up to 5 posts per month (you can generate unlimited drafts). The scheduler will pause when you reach your limit. Counts reset on the 1st of each month.
Here's the thing: when you hit that limit, that's usually when momentum starts. You'll have calibrated the AI, built your first Vector Store data, and seen the output quality improve. Upgrading at that point isn't removing a restriction — it's continuing an engine that's already running.