1

Overview & Plans

How PostFlow-AI Creates Your Content

PostFlow-AI uses a multi-stage AI pipeline to generate high-quality, personalized content. Every post goes through 10 AI processing steps across two different AI services:

GPT-5.2 × 3 GPT-5.2 × 3 Claude Sonnet 4.6 × 3 GPT-5.2 × 1

Generate 3 drafts → Review each draft → Rewrite in your style → Select the best

This pipeline ensures that every post is not just AI-generated — it's generated, reviewed, rewritten in your voice, and quality-checked before it reaches your queue.

💰 API cost at a glance — it's like an electricity bill

PostFlow-AI uses external AI services (OpenAI and Anthropic) that charge per use — think of it like an electricity bill, not a subscription. You only pay for what you generate.

  • 1 post generation ≈ $0.05–$0.06
  • 30 posts/month ≈ $1.50–$1.80
  • 100 posts/month ≈ $5–$6

You can set a monthly spending limit on OpenAI so costs never exceed what you're comfortable with. PostFlow-AI cannot "run away" with your credit — you're always in control. See the Quick Start Guide for setup details.

Plan Comparison

PostFlow-AI uses a freemium model. Content generation is unlimited on every plan — limits apply only to publishing. Each plan is designed for a different stage of your journey:

  • Free → Try — Experience the AI and see if it fits your workflow. Generate unlimited drafts, publish 5/month
  • Starter → Operate — Consistent daily posting with Web Search and WordPress. The "set it and run" plan
  • Professional → Scale — Growth engine with engagement tools, long-form articles, and unlimited publishing
Feature Free Starter ($79/mo) Professional ($265/mo)
Content generationUnlimitedUnlimitedUnlimited
Monthly publishes530Unlimited
Topics23Unlimited
Angles per topic23Unlimited
Content lengthShort / StandardShort – LongShort – Custom
PlatformsThreads + X + IG+ WordPressAll 4
Vector Store1 MB5 MB50 MB
AI model (rewrite)Claude Sonnet 4.6Claude Sonnet 4.6Claude Opus 4.6
Web Search👑
Photo Library3 photos / RandomUnlimited / AI SelectUnlimited / AI Select
AI Thumbnail freq.0.3 fixedCustomCustom
Long-Form Post👑👑
Engagement Tools👑👑

👑 = feature is visible but locked. Upgrade to unlock.

The 👑 Lock System

Premium features are not hidden — they're visible but locked with a 👑 icon. You can see exactly what each plan offers, and a click on any locked feature shows a comparison of what's available at each tier. This way, you always know what you'll get when you upgrade.

Examples of locked features in the UI

Usage Tracking

The dashboard header shows your usage at a glance: topics created, posts published this month, and Vector Stores used — each with its plan limit. Publish counts reset automatically on the 1st of each month.

Dashboard header showing plan usage
2

Basic Settings

The Basic Settings tab is the foundation of your content. Every field here shapes how the AI writes for you. Let's go through each one.

Identity Fields

Output Language

The language all generated posts will be written in. Currently supported: English. Additional languages (Japanese, French, Italian, Spanish) are planned for future releases. The AI will write, review, and rewrite entirely in this language.

Brand Name

Your business or personal brand name. This appears in the AI's role context — it knows it's writing "as" this brand.

Persona

Who is the "speaker" in your posts? Describe your role, background, and expertise. The more specific you are, the more authentic the AI's output will feel.

💡 Good vs. generic Persona examples

Generic: "A marketing expert"
Good: "An ex-Wall Street trader who left finance to open a French restaurant in Hokkaido, Japan. I share insights on food business, local sourcing, and the daily life of a restaurant owner."

Target Audience

Who are you writing for? Define their interests, challenges, and what they care about. The AI tailors tone and content to resonate with this audience.

Value Proposition

What value do you provide? What makes you unique? This shapes the AI's understanding of your "why" and helps it create content that naturally leads to your offerings.

Voice & Style

Writing Style / Tone

Describe your writing tone in natural language. Examples: "warm and practical, like talking to a friend", "professional but approachable", "casual with dry humor".

If you provide a Style Sample (below), the Writing Style / Tone field serves as a general guideline — the Style Sample takes priority for specific tone matching.

Style Sample

Paste 1–3 examples of your best writing. This is the most powerful way to make AI output sound like you. The AI analyzes your sentence patterns, pronoun usage, rhythm, and expressions, then reproduces them in every post.

💡 What makes a good Style Sample

Choose writing that represents your authentic voice — not your most polished or formal writing. Social media posts, newsletter paragraphs, or blog excerpts work great. Include variety: a serious piece and a lighter one. Total length of 300–500 words is ideal.

Banned Terms

Words or phrases the AI should never use. Add terms separated by commas. Common additions: overused buzzwords, competitor names, or phrases that don't match your brand.

⚠️ AI instruction, not a hard filter

Banned Terms are included as instructions in the AI prompt ("do not use these words"). The AI follows this in the vast majority of cases, but there is no post-generation filter that automatically removes them. If a critical term must never appear, always review your posts before publishing.

Content Enhancements

Optional toggles that add specific instructions to the AI prompt, shaping how the AI writes — not just what it writes about. Each toggle you enable adds a dedicated paragraph of instructions that the AI follows during generation.

💡 Include Surprising Facts — The AI will include at least one unexpected fact, little-known detail, or counter-intuitive data point per post. This is what makes readers stop scrolling and think "I didn't know that!"

📖 Include Background Context — Instead of just reporting what happened, the AI digs into the backstory: the timeline of events, historical precedents, and key players' motivations. This turns surface-level news into insightful analysis.

📝 Explain Jargon — When technical terms appear, the AI breaks them down in three layers: the abbreviation, the full name, and a simple explanation. For example: "the FOMC — Federal Open Market Committee — basically the group that decides if interest rates go up or down." This keeps your content accessible without dumbing it down.

🏠 Connect to Real Life — The AI links macro-level topics (GDP, interest rates, policy changes) to everyday life — grocery bills, rent, job prospects, savings. This is especially powerful for finance, economics, and policy content where readers want to know "what does this mean for me?"

✏️ Custom Instructions — A free-text field (up to 500 characters) for any additional instructions. Examples: "Always end with a question", "Include one metaphor per post", "Focus on a single topic per article — go deeper, not wider." These instructions are appended directly to the AI prompt.

💡 Stacking enhancements

You can enable multiple enhancements at once. For example, enabling both "Surprising Facts" and "Background Context" produces posts that are both informative and engaging. However, for shorter content lengths (Short / Standard), enabling too many may cause the AI to squeeze too much into a tight space. For short posts, pick 1–2 enhancements. For long-form content, enable all that apply.

Content Types

Define different article structures that the AI rotates between. Each Content Type has four fields:

Name — A short label for the structure (e.g., "Scoreboard", "Story", "Explainer", "Hot Take").

Description — What this type is about. The AI reads this to understand the overall feel (e.g., "Data-driven quick update with key numbers and market context").

Structure — The flow of the article, described with arrows. The AI follows this as a blueprint. Example: hook → main point → example → takeaway. The AI produces natural prose — no numbered sections or headings — but the underlying flow follows your structure.

Frequency — A number between 0.0 and 1.0 that controls how often this type is selected. All frequencies should roughly add up to 1.0. For example, if you have three types at 0.4, 0.4, and 0.2, the first two will each appear about 40% of the time and the third about 20%.

💡 Why Content Types matter

Without Content Types, the AI chooses its own structure freely — which can lead to posts that feel repetitive over time. By defining 3–5 distinct types with different structures, you create natural variety in your feed. Readers experience a mix of quick data updates, deep narratives, simple explainers, and opinion pieces — all in your voice.

📋 Example setup

Here's a real configuration for a finance content account:

  • Scoreboard (0.3)tl;dr → key data points → what each means → big picture → takeaway
  • Story (0.3)hook → what happened → why (backstory) → little-known facts → what's next → personal take
  • Explainer (0.2)what is it? → super simple explanation → real example → why it matters now → key takeaway
  • Hot Take (0.1)bold opinion → evidence → counter-argument → why I still believe this → challenge to reader
  • Roundup (0.1)week overview → top 3 stories → quick stats → what to watch next week

Content Settings

Content Length Free: Short/Standard

Controls the target length of generated posts:

  • Short: 300–500 characters (quick tips, observations)
  • Standard: 800–1,200 characters (typical social media posts)
  • Long: 1,500–2,000 characters (in-depth insights) — Starter+
  • Extra Long: 7,000–10,000 characters (articles) — Professional
  • Custom: Set your own min/max — Professional
CTA (Call to Action)

What you want readers to do after reading your post. Example: "Visit my website", "Book a free consultation", "Try our new menu".

CTA Frequency

How often the CTA is included. Set as a probability between 0 and 1: 0.3 = 30% of posts include the CTA, 0 = never, 1 = always. A value of 0.2–0.3 keeps your feed from feeling too "salesy".

Post Destinations

Post to Threads / X / WordPress / Instagram

Check the platforms you want to publish to. These are the global defaults — you can override them per topic in the Topics tab. When you publish a post from the queue, it goes to all checked platforms simultaneously.

Post Mode

Controls what happens after the AI generates a post:

  • Review Mode (recommended): Posts are saved to the queue. You review, edit, and publish manually
  • Auto Mode: Posts are generated AND published automatically. Use with caution — you won't see the content before it goes live
3

Topics & Content Angles

Topics define what you post about. Angles define how you approach each topic. Together, they ensure your content stays varied and interesting.

Creating Topics

Go to the Topics tab and click + Add Topic. Enter a descriptive topic name that defines a content theme.

💡 Good vs. vague topic names

Too vague: "Marketing"
Good: "Social media growth strategies for solo coaches"
Even better: "Time-saving meal prep tips for busy working parents"

Adding Content Angles

Each topic should have multiple angles — different perspectives that the AI rotates through to keep content fresh.

Angle Structure

Each angle has a Label (the perspective name) and Search Hints (comma-separated keywords for Vector Store searches).

Time Management | schedule, calendar, focus, prioritize, deep work

PostFlow-AI uses a balanced rotation system — it tracks how many times each angle has been used and prioritizes the least-used ones. It also avoids using the same angle twice in a row.

Topics tab with angles and settings

Per-Topic Settings

Each topic can override global settings. Expand the setting panels below each topic to configure:

  • Post destinations — Override which platforms this topic posts to
  • Vector Store — Connect a topic-specific knowledge base
  • Web Search — Enable real-time web data for this topic (Starter+)
  • Photo Library — Per-topic image collection
  • AI Thumbnail — Character description and prompt template
  • Long-Form settings — Frequency and WordPress draft/publish status
4

Vector Store

The Vector Store is your AI's personal knowledge base. It stores information that the AI can reference when generating posts — your expertise, product details, case studies, and more.

Every file you upload makes every future post smarter. The more you feed it, the more it sounds like you — and the harder it is to go back to writing everything yourself.

This is what makes PostFlow-AI a self-evolving system.

Don't worry — you don't need to be technical to use it. There are two levels, and Level 1 alone makes a big difference.

How It Works

When the AI generates a post, it searches the Vector Store for information relevant to the current topic and angle. This means your posts contain real facts from your business, not generic AI guesses.

🟢 Level 1: Copy & Paste Your Best Posts (Easy — 5 minutes)

The fastest way to improve your AI output. No technical knowledge required.

  1. Go to the 📁 Training Data tab
  2. Create a new file and paste 5–10 of your best social media posts — the ones that got engagement, felt "like you", or explained your expertise well
  3. Go to the 🗄️ Vector Store tab and click "Create Vector Store", then upload the file
  4. Copy the Vector Store ID and assign it to your topic in the Topics tab

That's it. The AI will now reference your real content when generating new posts. Even this simple step dramatically improves output quality.

💡 Don't have past posts? Start with your knowledge

Write down 5–10 facts, tips, or insights you'd normally share with a client or customer. For example: "Our restaurant sources all vegetables within 30km", "I've been coaching entrepreneurs for 8 years", "The #1 mistake new podcasters make is..."

🔵 Level 2: Structured JSON for Power Users (Advanced)

For maximum AI performance, organize your knowledge into structured JSON with clear categories. This is optional but produces the best results for users with lots of domain knowledge.

✅ Structured data performs best

Use JSON with clear categories. The AI can search this much more effectively than plain text. Include factual information: numbers, dates, names, specific details.

✅ Separate facts from style

Vector Store = what to say (facts, data, knowledge). Style Sample = how to say it (tone, rhythm, expressions). Keep these separate for best results.

✅ Add reference posts for better results

Include 5–10 examples of well-performing posts in your Vector Store. Label them clearly as reference examples. The AI uses these to understand what resonates with your audience.

Important Rules (Both Levels)

🔑 Key principle: category-specific data

Create separate Vector Stores for each topic. A "kitchen sink" approach (mixing all your knowledge into one store) produces unfocused content. Instead, create a Vector Store for "Italian wine knowledge" and another for "Restaurant management tips".

🚫 Avoid mixing multiple topics

Don't put "cooking tips" and "financial advice" in the same Vector Store. Create separate stores and assign them to the appropriate topics.

Vector Store tab
5

Feedback Loop

The Feedback Loop is how PostFlow-AI gets smarter over time. It's the secret to transforming generic AI output into increasingly personalized content.

The First Posts Are Calibration — and That's by Design

When you first start using PostFlow-AI, the AI doesn't know your specific knowledge yet. Your first 3–5 posts are a calibration phase — the AI is learning what works for your brand. This is completely normal and not a sign that the tool isn't working.

📈 What to expect at each stage
  • Posts 1–5: Calibration. Output is decent but generic. You'll edit a lot — that's the point
  • Posts 5–10: The AI starts sounding more like you. Edits get smaller
  • Posts 10–20: Your voice comes through clearly. Most posts need only minor tweaks
  • Posts 20+: The AI consistently produces content you're proud to publish

The key: you know exactly when it gets good. People who stick through the calibration phase are the ones who love this tool.

How the Feedback Loop Works

The Virtuous Cycle

① AI generates a post ② You edit & improve it
④ Next post is better ③ Add edited version to Vector Store

Step-by-Step

  1. Generate a post — Use the scheduler or manual generation
  2. Review in Post Management — Click "Edit" on any post in the queue
  3. Edit the content — Fix facts, adjust tone, add your personal insights. This is your chance to inject real expertise
  4. Save your edited version — The improved post is now in your queue
  5. Add to Vector Store — Copy the edited content and add it to your topic's Vector Store as a reference post. This teaches the AI what "good" looks like for your brand
  6. Repeat — Each cycle makes the AI's output closer to your voice and expertise
💡 The calibration effort pays off exponentially

Each edited post you add to the Vector Store makes every future post better. This isn't a linear improvement — it compounds. The 10 minutes you spend editing post #7 improves posts #8, #9, #10, and every post after that.

⚠️ Quality in = quality out

Only add your best edited versions to the Vector Store. If you add mediocre or unedited AI output, the AI learns to produce more of the same. Think of the Vector Store as a "hall of fame" for your content.

6

Multi-Platform Posting

PostFlow-AI can publish to 4 platforms simultaneously, optimizing the content format for each one automatically.

📱
Threads
Up to 500 chars (with image) or 10K chars (text only). Auto-summarized if over limit.
🐦
X (Twitter)
140 chars (JP) / 280 chars (EN) on X Free. Auto-summarized via Claude if over limit.
📝
WordPress
Full article with featured image. Draft or Publish status per topic. Starter+ only.
📸
Instagram
Image required for every post. Markdown auto-removed. 2,200 char caption limit.

How Auto-Summarization Works

When your content exceeds a platform's character limit, PostFlow-AI uses Claude AI to intelligently summarize it. The summary preserves your key message, tone, and any specific data points from the original post — it's not just a truncation.

This means you can write in "Standard" length (800–1,200 chars) and PostFlow-AI will automatically adapt it for every platform.

Platform-Specific Setup

📱 Threads

Required: Threads Access Token from the Meta Developer Portal.

Enter it in API Settings → Threads Access Token.

Threads has a 2-step posting process (create container → publish). PostFlow-AI handles this automatically with built-in retry logic.

🐦 X (Twitter)

Required: 4 keys from the X Developer Portal: API Key, API Secret, Access Token, Access Secret.

Enter them in API Settings → X (Twitter) section.

If your X account is on the Free tier (280 chars for English), content over the limit is automatically summarized by Claude. If you have X Premium+ (25,000 chars), the full content is posted.

📝 WordPress Starter+

Required: Site URL, Username, and Application Password.

To generate an Application Password: WordPress Admin → Users → Your Profile → scroll to "Application Passwords" → enter a name → click "Add New".

Enter these in API Settings → WordPress section.

Each topic can set separate WordPress status for normal posts (Draft/Publish) and long-form posts (Draft/Publish).

📸 Instagram

Required: Instagram Business/Creator account + Facebook Page connection, IG Access Token, IG User ID from the Meta Developer Portal.

Enter in API Settings → Instagram section.

⚠️ Instagram always requires an image

Instagram does not support text-only posts. Every Instagram post needs an image — either from the Photo Library, AI Thumbnail, or a manually assigned image. If no image is available, the Instagram post will be skipped.

🖼️ imgbb API Key (for image hosting)

When posting images to Threads or Instagram, PostFlow-AI needs a public URL for the image. If you have WordPress connected, it uploads via WordPress Media Library. If not (e.g., Free plan), you need an imgbb API key.

Get a free key at api.imgbb.com and enter it in API Settings.

Per-Topic Platform Overrides

By default, all topics use the global posting destinations from Basic Settings. But you can override this per topic — for example, post "Daily Tips" only to Threads and X, while "In-Depth Analysis" goes to WordPress and Instagram.

💡 How the override works

When a topic has its own platform checkboxes set, those settings completely replace the global defaults for that topic — in both Auto Mode and manual publishing. For example: if Basic Settings has all 4 platforms checked, but a topic has only X checked, posts for that topic will go to X only.

7

Visual Content

PostFlow-AI offers two ways to include images with your posts: Photo Library (your own photos) and AI Thumbnail (auto-generated images). Both are configured per topic.

Image Frequency

The Image Frequency setting controls how often an image is attached to a post. Set it as a probability between 0 and 1:

  • 0 = never (text-only posts)
  • 0.3 = 30% of posts get an image
  • 1.0 = every post gets an image

Free plan users have a fixed frequency of 0.3. Starter and Professional can set any value.

⚠️ Instagram requires 1.0

If you post to Instagram, every post needs an image. If Image Frequency is set below 1.0, some posts will skip Instagram posting because there's no image. Set Image Frequency to 1.0 on any topic that targets Instagram.

Image Source: Photo Library vs. AI Generate

Each topic chooses one source for images:

📷 Photo Library

Upload your own photos — product shots, behind-the-scenes, food photos, etc. When a post needs an image, one is selected from your library.

Selection modes:

  • Random — picks a photo at random (available on all plans)
  • AI Select — reads the generated post and selects the most relevant photo based on its description and tags (Starter+ only)

Free plan: up to 3 photos per topic, Random selection only.

🎨 AI Generate (Thumbnail)

PostFlow-AI generates a custom thumbnail using OpenAI's image generation API. Each thumbnail is based on the post's title and key points.

To set up AI Thumbnails for a topic, configure these fields in the topic settings:

  • Reference Image — An image of your character/mascot (optional). The AI uses this to maintain consistent character appearance across thumbnails
  • Character Description — Text description of the character's appearance
  • Prompt Template — The full prompt sent to the image generation API. Use placeholders: {title}, {summary}, {key_points}, {character_section}
  • Character Layout — Where the character appears and what they're doing
Photo Library and AI Thumbnail settings

Image Hosting for Threads & Instagram

Threads and Instagram require images to have a public URL. PostFlow-AI handles this automatically:

  1. WordPress users — Images are uploaded to your WordPress Media Library (automatic)
  2. Non-WordPress users — Images are uploaded to imgbb (requires imgbb API key in API Settings)
8

Engagement Tools Professional

The Engagement tab helps you grow your X (Twitter) following organically by finding, analyzing, and engaging with relevant posts in your niche. This is currently X-only and requires the Professional plan.

Engagement Workflow

The tool follows a 5-step flow designed to produce authentic, high-quality engagements — not robotic spam.

① Generate Keywords ② Search X Posts ③ AI Analysis
④ Draft Replies / Quotes ⑤ Review & Post
① Generate Keywords

Click "Generate Keywords" to have GPT-5.2 analyze your profile (audience, topics, angles) and suggest search queries for X. It rotates through your topics to ensure coverage. You can select which keywords to search with.

② Search X Posts

PostFlow-AI searches X using the selected keywords via the X API v2 Recent Search endpoint. Results include metrics (likes, retweets, replies, impressions) and are sorted by an engagement score.

Requires X Bearer Token in API Settings (separate from the 4 posting keys).

③ AI Analysis

GPT-5.2 analyzes each found post and rates it on relevance to your niche. This helps you focus your engagement on posts where your expertise adds genuine value.

④ Draft Replies / Quote Tweets

For posts you want to engage with, Claude Opus 4.6 generates 3 reply drafts (or quote-tweet drafts). Each draft includes a [___] placeholder where you insert your own personal experience or insight — this is what makes the reply feel human, not bot-generated.

💡 Why the [___] placeholder matters

The AI creates the structure and context, but the personal detail is yours. Replacing [___] with something only you could say (a real number, a specific experience, a named client result) is what transforms an AI draft into authentic engagement.

⑤ Review & Post

Edit the draft, fill in the [___], and click Post Reply or Post Quote. You can also Like or Repost directly from the engagement interface.

⚠️ Engagement rules of thumb

Don't mass-engage. X's algorithm rewards quality over quantity. Focus on 3–5 thoughtful replies per session rather than liking 50 posts. Always add personal value — generic praise ("Great point!") is worse than no engagement at all.

Engagement tab with keyword generation and search results
9

Scheduling & Post Management

The Scheduler is what makes PostFlow-AI truly automatic. It generates posts on a regular interval without any manual intervention.

How the Scheduler Works

  1. Click "Start Scheduler" in the Scheduler tab
  2. PostFlow-AI immediately begins generating the first post (10 API calls — see generation times below)
  3. A countdown begins until the next generation, based on your interval setting
  4. The cycle repeats until you stop the scheduler or close the application
⏱️ Typical generation times

Each post goes through 10 API calls across two AI services. Actual generation time depends on content length, AI service load, and whether an image is generated:

  • Short posts: ~8–10 minutes
  • Standard posts: ~12–15 minutes
  • Long posts: ~15–20 minutes
  • + AI Thumbnail: add ~1–3 minutes

These times can vary depending on OpenAI and Anthropic server load. During peak hours, generation may take longer. The scheduler accounts for this — the interval timer starts from the beginning of each generation, not the end.

⚠️ Your PC must stay running

PostFlow-AI runs locally on your computer. If you close the application, put your PC to sleep, or shut it down, the scheduler stops. The console window (black window) must also remain open.

Scheduler Settings

Post Generation Interval

How often a new post is generated. Set this in the Basic Settings tab using the dropdown. Common settings:

  • 2 hours — Aggressive posting, multiple posts per day
  • 3 hours (recommended) — About 6–8 posts per day
  • 8 hours — Three times daily, good for consistent presence
  • 24 hours — Once daily, sustainable long-term pace

If a generation takes longer than the interval (e.g., 15-minute generation with a 10-minute interval), the next generation starts immediately.

Post Mode: Review vs. Auto

Review Mode (default, recommended): Posts are saved to the queue with "Pending" status. You review, edit, and publish manually from the Post Management tab.

Auto Mode: Posts are generated and immediately published to all enabled platforms. No human review. Use this only once you're confident in your settings and the Feedback Loop has trained the AI well.

Post Management

The Post Management tab is your content queue. Every generated post appears here with its status, topic, angle, and timestamp.

Post Actions
  • Edit — Read the full post and modify title, body, or platform-specific content before publishing
  • Publish Selected — Select posts with the checkbox, then send them to all enabled platforms simultaneously. If a post exceeds a platform's character limit, it's automatically summarized
  • Delete Selected — Remove selected posts from the queue (does not affect published posts)
Post Statuses
  • Pending — Generated and waiting for review / publishing
  • Posted — Successfully published to your enabled platforms

Bulk Publishing

Select multiple posts and click "Publish Selected" to publish them all at once. Each post is sent to the platforms specified in its topic settings. Published post counts are tracked against your monthly limit.

Content Repetition Prevention

PostFlow-AI uses multiple strategies to keep content fresh:

  • Angle rotation — Tracks usage count per angle and prioritizes least-used ones
  • Opening sentence differentiation — Analyzes the first sentence of recent posts and instructs the AI to use different starting patterns
  • Ending pattern differentiation — Also varies sentence endings to avoid repetitive cadence
  • Past post summaries — Provides summaries of recent posts for the same topic so the AI avoids repeating themes
Post Management queue
10

Troubleshooting

Common issues and how to solve them.

Content Generation Failures

Posts suddenly stop generating (API rate limit)

This is the most common issue. If PostFlow-AI was working fine and suddenly stops generating content, the most likely cause is hitting your API usage limit on OpenAI or Anthropic.

How to check:

How to fix: Add more credit to the service that's run out. If you set a monthly spending limit (Hard Limit), you may need to increase it. The console window will show error messages like "insufficient_quota" or "rate_limit_exceeded" — check there for clues.

💡 Prevention tip

Keep at least $5 credit on each service. If you run the scheduler frequently (e.g., every 2 hours), monitor your usage weekly. A single post generation costs ~$0.05–$0.06 (English), so $5 covers roughly 80–100 generations.

Threads / Instagram access token expired

Meta access tokens expire periodically (typically every 60 days for long-lived tokens). When expired, Threads and Instagram posts will fail with a 401 or "token expired" error.

How to fix: Generate a new token from the Meta Developer Portal and update it in API Settings. Consider setting a calendar reminder to refresh the token before it expires.

Startup & General

PostFlow-AI.exe doesn't start

Make sure you extracted the full ZIP file (don't run it from inside the ZIP). Check that the config/ and data/ folders are present next to the .exe file. If Windows Defender blocks it, click "More info" → "Run anyway".

The console window closed immediately

An error occurred during startup. Open a Command Prompt, navigate to the PostFlow-AI folder, and run PostFlow-AI.exe from the command line to see the error message.

"Dashboard not loading" in the browser

The dashboard runs on http://localhost:5000. If it doesn't open automatically, try entering this URL manually. If the console shows errors, the port may be in use — check for other applications using port 5000.

API Key Errors

"OPENAI_API_KEY is not set"

Your OpenAI API key is missing or invalid. Go to API Settings, enter your key, and click Save. Make sure there are no extra spaces before or after the key.

"Claude API key is not set"

Your Anthropic API key is missing. Enter it in API Settings. The key should start with sk-ant-.

"Insufficient quota" or billing errors

Your API credit is exhausted. See "Posts suddenly stop generating" above for detailed steps to check and resolve billing issues on both OpenAI and Anthropic.

Platform Posting Errors

Threads: "Token expired" or 401 error

See "Threads / Instagram access token expired" above. Generate a fresh token from the Meta Developer Portal and update it in API Settings.

X: "403 Forbidden"

Your X API keys may not have write permissions. Check that your app in the X Developer Portal has "Read and Write" access. Also verify all 4 keys are entered correctly.

WordPress: "401 Unauthorized"

Check your Application Password. Note: this is NOT your WordPress login password — it's a separate password generated in WordPress Admin → Users → Your Profile → Application Passwords.

Instagram: "Image upload failed"

Instagram requires a public image URL. If you don't have WordPress connected, make sure your imgbb API key is set in API Settings. Also check that the image file exists in the data/thumbnails/ or data/photo_library/ folder.

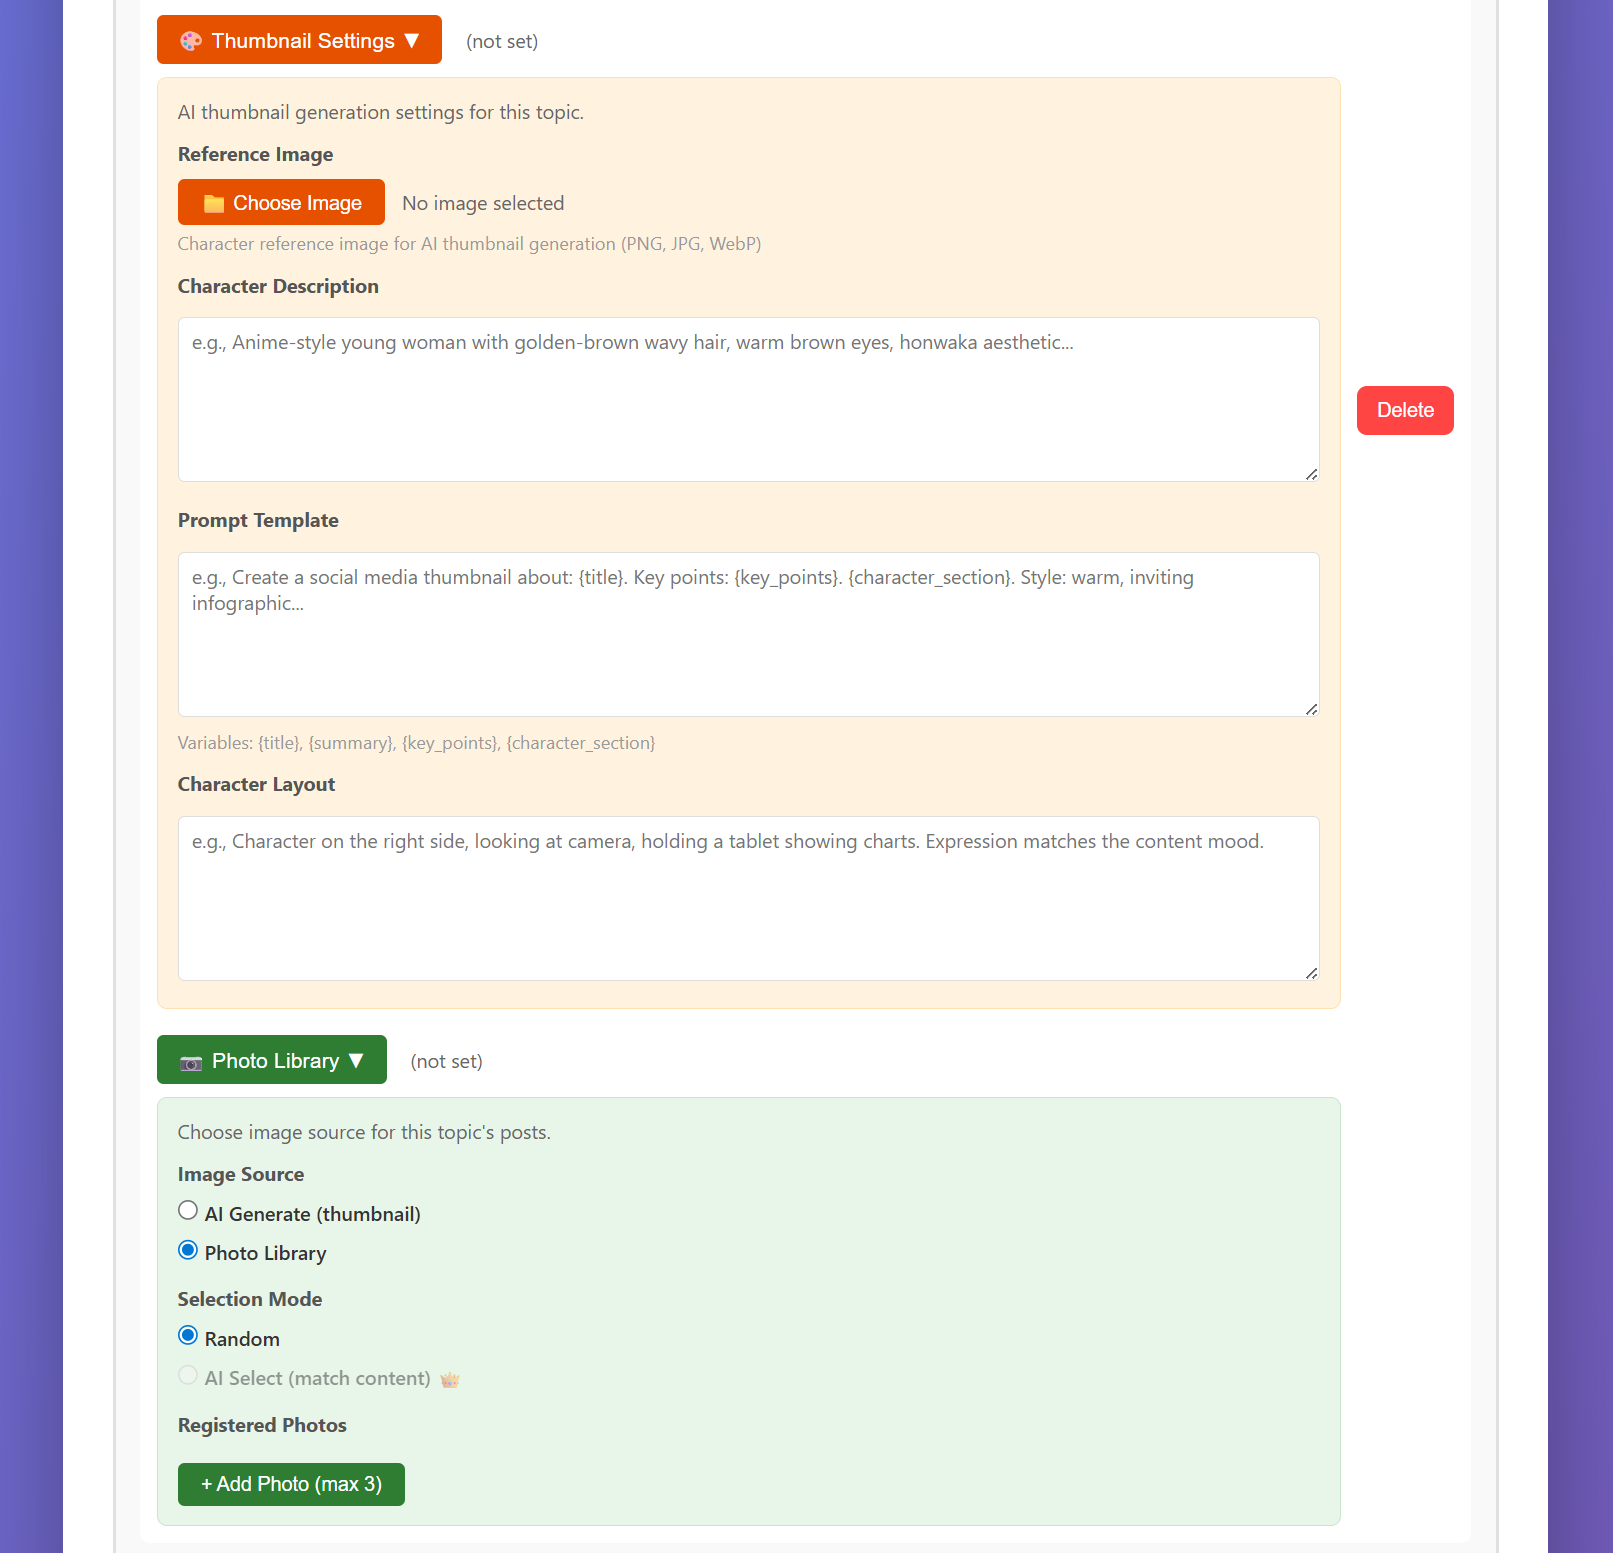
Instagram: post skipped

Instagram cannot publish text-only posts. If a post has no image (because Image Frequency wasn't triggered), Instagram is automatically skipped. Set Image Frequency to 1.0 for topics targeting Instagram.

Content Quality Issues

🔧 Output feels off? Check these 4 things first:

  1. Is your Persona specific enough? (not just "a coach" — who, for whom, what's unique?)
  2. Did you add a Style Sample? (at least 200+ words of your real writing)
  3. Is your Vector Store populated? (even 5 pasted posts make a huge difference)
  4. Are your Topics specific enough? (not "Marketing" — narrow it down)

Fixing even one of these usually produces a noticeable improvement on the next generation.

Posts sound generic or "too AI"

This is normal when starting out. The solution is the Feedback Loop (Section 5). Add a Style Sample, provide detailed Persona and Voice descriptions, and most importantly — edit generated posts and add the good ones to your Vector Store. The AI improves dramatically after 5–10 cycles.

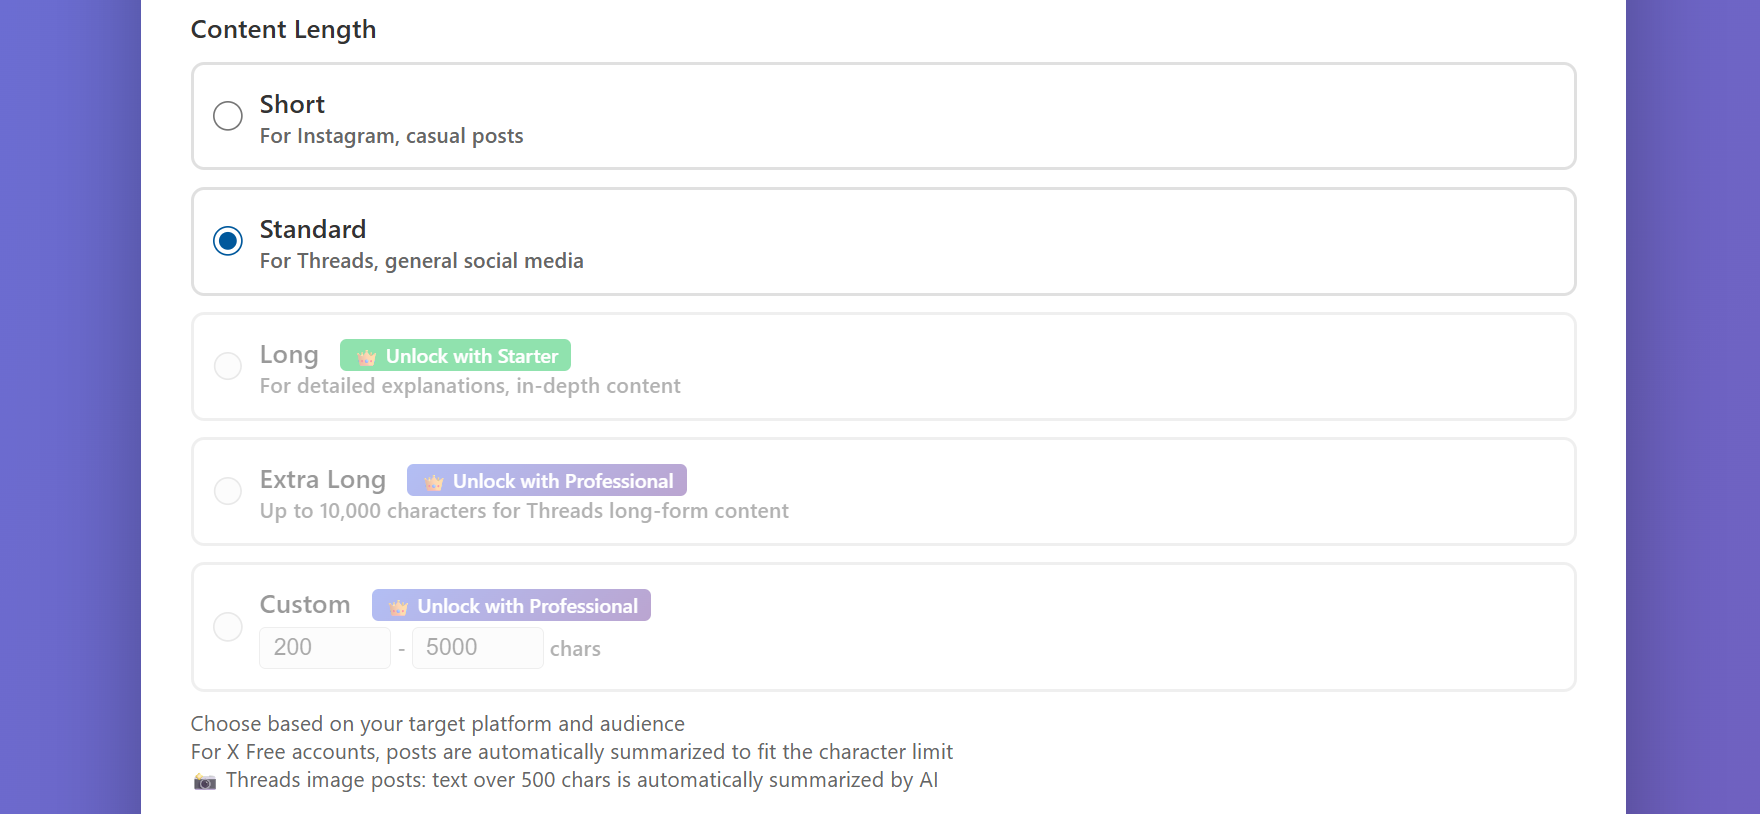
Posts are too long or too short

Check the Content Length setting in Basic Settings. Also note that the AI targets a range (e.g., 800–1,200 chars for Standard) — occasional variation is normal.

Posts keep repeating similar content

Add more angles to your topics. The rotation system works best with 3+ angles per topic. Also ensure your Vector Store has diverse content — if all your reference data is about one sub-topic, the AI will keep circling back to it.

Common Setup Mistakes (and How to Fix Them)

These are the settings mistakes that cause 90% of quality issues. If your output feels off, check this list first.

❌ Persona is too vague

Symptom: Posts feel generic, could have been written by anyone.
Cause: Persona like "A business coach" gives the AI nothing unique to work with.
Fix: Add specific details — your background, your niche, your unique perspective. "An ex-corporate lawyer who pivoted to life coaching for burnt-out tech workers" gives the AI a clear voice to write from.

❌ No Style Sample provided

Symptom: Posts sound "AI-polished" — technically fine but lack personality.
Cause: Without a Style Sample, the AI has no reference for your writing rhythm, word choices, and sentence patterns.
Fix: Paste 2–3 examples of your best writing (300–500 words total). Social media posts, newsletter excerpts, or even casual emails work great.

❌ Topics are too broad

Symptom: Posts lack depth, stay surface-level, feel like "Wikipedia summaries".
Cause: A topic like "Marketing" is too wide — the AI doesn't know what aspect to focus on.
Fix: Narrow your topics. "Instagram growth tactics for handmade jewelry businesses" is much better than "Social media marketing".

❌ Vector Store data is mixed across topics

Symptom: Posts randomly reference unrelated subjects. A post about cooking mentions financial data.
Cause: Multiple topics sharing one Vector Store. The AI pulls whatever seems relevant, even if it's from the wrong domain.
Fix: Create separate Vector Stores for each topic and assign them in the Topics tab.

❌ Only 1 angle per topic

Symptom: Posts feel repetitive, covering the same ground with slightly different words.
Cause: With only 1 angle, the AI has no variety to work with. The rotation system needs multiple angles to shine.
Fix: Add at least 2–3 angles per topic. Each angle should offer a genuinely different perspective or approach to the subject.

Log Files

PostFlow-AI saves detailed logs for debugging:

  • data/scheduler.log — Scheduler execution history
  • data/debug/gpt5_drafts_*.txt — Raw GPT-5.2 draft outputs
  • data/debug/claude_rewritten_*.txt — Claude rewrite outputs

If you need help, these log files contain the information needed to diagnose problems.

11

Updates & Changelog

PostFlow-AI is actively developed. As the project matures, version history and changelogs will be documented here.

How to Update

  1. Download the latest version from your account
  2. Extract the new ZIP to a new folder
  3. Copy your config/ and data/ folders from the old version to the new one
  4. Copy your .env file from the old version
  5. Launch the new PostFlow-AI.exe
💡 Your data is portable

All your settings, posts, and Vector Store data are stored in the config/ and data/ folders. As long as you copy these to the new version, nothing is lost.

Current Version

v1.1.0 (March 2026)

Core features: multi-stage AI pipeline (GPT-5.2 + Claude Sonnet 4.6), 4-platform posting (Threads, X, WordPress, Instagram), Vector Store, Photo Library, AI Thumbnails, Engagement Tools, freemium plan system with license management, and auto-scheduling.

Planned Features

  • Analytics dashboard — track post performance across platforms
  • Spanish and French language UI
  • Mobile-friendly dashboard redesign
  • One-click deployment to cloud for 24/7 scheduling

For feature requests and bug reports, please contact support@postflow-ai.app.